Rotating a Single Page on Microsoft Word: A Step-by-Step Guide
Rotating a single page in Microsoft Word is a straightforward process. All you need to do is select the page you want to rotate, go to the “Layout” tab, click on “Page Setup,” hit “Margins,” and then click on “Orientation” to choose between portrait or landscape. Once you’ve made your selection, the page will be rotated accordingly.
After completing this action, the selected page will change its orientation while the rest of the document remains unchanged. This is particularly useful when you have a page with a wide table or chart that reads better in a landscape format.

Introduction
Ever been in a situation where you’re working on a Microsoft Word document, and you come across a page that just doesn’t look right in the regular portrait orientation? Maybe you’ve got a wide table, a large image, or a chart that would fit better on a landscape page. Or perhaps, you’re creating a document that requires a mix of both orientations for different sections. Whatever the reason, knowing how to rotate a single page in Word can be a handy skill to have up your sleeve.
Rotating a single page isn’t just about making things look pretty. It’s about functionality, readability, and making sure your document serves its purpose. It’s a simple task that can make a significant impact on the presentation of your work. Whether you’re a student, a professional, or just someone who likes to keep their documents neat, this trick is relevant to you. Let’s dive into the step-by-step process of how to do it.
Step by Step Tutorial: Rotating a Single Page on Microsoft Word
The following steps will guide you on how to rotate a single page in your Word document without affecting the rest of your pages.
Step 1: Open the “Page Setup” Dialog Box
Click on the “Layout” tab, then on “Page Setup.”
The “Page Setup” dialog box is where you can change various settings for your page, including margins, size, and orientation. By accessing this box, you’re a step closer to rotating your page.
Step 2: Navigate to the “Margins” Tab
Select the “Margins” tab within the “Page Setup” dialog box.
This is where you’ll find the option to change the orientation of your page – but be careful not to change the margins unless you need to, as this will affect the whole document.
Step 3: Choose “Landscape”
Under “Orientation,” click on “Landscape” to rotate the page.
By selecting “Landscape,” you’re telling Word to rotate the page so that it’s wider than it is tall. It’s perfect for those wider tables or large images that don’t fit well on a portrait page.
Step 4: Apply to Selected Text
Click on the drop-down menu next to “Apply to” and choose “Selected text.”
This step ensures that only the page you want to rotate will be changed, leaving the rest of your document in its original orientation. Be sure to highlight the text or place your cursor on the page you want to rotate before doing this.
Step 5: Confirm and Exit
Hit “OK” to confirm the changes, and then exit the dialog box.
Congratulations! You’ve successfully rotated a single page in your Word document. Now, you can continue working on your document with its new layout.
Additional Information
While rotating a single page in Microsoft Word is a simple process, there are a couple of things to keep in mind. First, ensure that you are in “Print Layout” view to see the effect of the page rotation on your document. Secondly, remember that rotating a page can sometimes lead to minor formatting issues, so always review your document after making the change.
Moreover, be mindful of how a rotated page will appear when printed. If you’re planning to print the document, check your printer settings to make sure it can handle a document with mixed orientations. Additionally, consider your audience – if your document is meant to be read online, rotating a page might not be necessary and could be potentially disorienting for the reader.
Remember to use the page rotation feature judiciously. It’s a great tool for improving the readability and presentation of certain elements within your document, but it’s not always suitable for every page or every document. Use your judgement and think about the final purpose of your document when deciding to rotate a page.
- Open the “Page Setup” dialog box from the “Layout” tab.
- Navigate to the “Margins” tab.
- Choose “Landscape” under “Orientation.”
- Apply to “Selected text” from the drop-down menu.
- Confirm the changes and exit the dialog box.
Frequently Asked Questions
Can i rotate a single page to portrait instead of landscape.
Yes, if your document is already in landscape, you can rotate a single page back to portrait using the same steps.
Will rotating a page affect my headers and footers?
Yes, rotating a page can potentially alter the position of headers and footers, so you may need to adjust them after rotating the page.
Can I rotate a page in a Word document on a Mac?
Absolutely! The steps are similar on a Mac, just make sure you’re using the latest version of Microsoft Word.
How do I rotate a page in a read-only or protected document?
You will need editing permissions to rotate a page. If the document is protected, you will need to request permission from the document owner.
Can I rotate multiple pages at once?
Yes, you can rotate multiple pages if you select all the text on those pages before following the steps outlined.
Rotating a single page on Microsoft Word is a nifty trick that can have a significant impact on the presentation and functionality of a document. It’s a relatively simple process that can provide flexibility and improve the overall look of your work.
However, be mindful of formatting, printing compatibility, and reader experience when implementing this feature. The key is to use this tool when it truly enhances the document and serves a clear purpose. With this knowledge in hand, you’re ready to make your Word documents shine with just the right layout. So, go ahead, give it a spin!

Matthew Burleigh has been writing tech tutorials since 2008. His writing has appeared on dozens of different websites and been read over 50 million times.
After receiving his Bachelor’s and Master’s degrees in Computer Science he spent several years working in IT management for small businesses. However, he now works full time writing content online and creating websites.
His main writing topics include iPhones, Microsoft Office, Google Apps, Android, and Photoshop, but he has also written about many other tech topics as well.
Read his full bio here.
Share this:
Join our free newsletter.
Featured guides and deals
You may opt out at any time. Read our Privacy Policy
Related posts:
- How to Insert Text Box in Google Docs
- How to Set Landscape as Default Orientation in MS Word 2010
- How to Make Google Docs Landscape
- How to Vertically Center Text in Word 2013
- 1 Inch Margins in Word: How to Guide
- How to Change Microsoft Word Margins in Office 365: A Step-by-Step Guide
- How to Change Page Margins in Excel 2010
- How to Rotate Screen on iPhone 7
- How to Remove Section Breaks in Word Documents
- How to Center Worksheet Horizontally and Vertically in Excel 2010
- How to Set Margins in Word 2010
- iOS 17 – How to Turn Off Auto Rotate on an iPhone
- How to Single Space in Word for Office 365
- How to Return to Normal View in Word 2010
- How to Turn Off Auto Rotate on iPhone [2023 Guide]
- 1 Inch Margins Google Docs Guide
- How to Center Text in Word [2023 Guide]
- How to Set Print Margins in Excel 2010
- How to Enable or Disable Portrait Orientation Lock Button on iPhone
- How to Change Margins in Word 2010 from Inches to Centimeters
How-To Geek
How to make only one page landscape in a word document.
Turn a single page in your document for a better view and appearance.
Quick Links
Change one page to landscape with page setup, make one page landscape by inserting a break, key takeaways.
Select the text on the page you want to be landscape in your document, then go to the Layout tab and open the "Page Setup" window. Set the orientation to "Landscape," and pick "Selected Text" in the drop-down menu.
By default, Microsoft Word orients its pages in portrait view. While this works fine in most situations, you may have a single page that would look better in landscape view. Here are two ways to make one page landscape in Word.
The quickest and easiest way to convert a page from portrait to landscape in Word is to select the content and turn only that page. This method works with text, images , tables , and other items you have on the page.
Select all items on the page. If you have text, drag your cursor through all of it. If you have an image, table, chart, or another type of object, simply select it.
Go to the Layout tab and click the arrow on the bottom right corner of the Page Setup section of the ribbon. This opens the Page Setup dialog box.
Confirm that you're on the Margins tab . Below Orientation, choose "Landscape." Then at the bottom, click the Apply To drop-down box and choose "Selected Text." Click "OK."
When the dialog box closes, you will see your page turn to landscape view.
While the above method is the simplest, you may run into difficulties if you have different types of items on your page. For instance, you might have an image or table with text wrapped around it .
Although you can select all the content on the page, it may display on more than one page when you change the orientation. Luckily, there is another way to make one page landscape in these situations using a section break .
Place your cursor at the start of the page you want to change before any text or items.
Go to the Layout tab, click the Breaks drop-down arrow, and choose "Next Page." This inserts a section break in your document.
Stay on the Layout tab, click the Orientation drop-down arrow, and pick "Landscape." This changes the current and all subsequent pages to landscape view.
To return the remaining pages to portrait view, go to the next page and place your cursor at the beginning of the content.
Go to the Layout tab, click the Breaks drop-down arrow, and choose "Next Page." This inserts another break in your document.
Now on the Layout tab, click the Orientation drop-down arrow and pick "Portrait."
You'll then see the remaining pages turn back to portrait view, leaving the one page you chose in landscape view.
If you use Google Docs as well as Microsoft Word, you can change the page orientation in Google Docs just as easily.
- Tech Gift Ideas for Mom
- Hot Tech Deals at Target Right Now
How to Insert a Landscape Page Into a Portrait Document in Word
Having trouble fitting that wide graph into your document?
What To Know
- Manual: Select Layout on the Ribbon. Go to Page Setup > Breaks > Next Page . Pick an area. Set the margins and choose your orientation.
- Auto: Go to Layout > Page Setup > Page Setup > Margins . Set the orientation and Apply to the Selected Text in the preview.
This article explains how to insert a page with a different orientation from the rest of your Word document. There are two ways to perform this action in Word, by inserting section breaks manually at the top and the bottom of the section that you want in the opposite orientation or by selecting text and allowing Word to insert the new sections for you. This article applies to Word 2019, Word 2016, Word 2013, Word 2010, and Word for Microsoft 365.
Manually Insert Section Breaks
Here's how to tell Microsoft Word where to change the orientation.
In your document, place your cursor before the area where the pages should rotate. On the ribbon, select Layout .
In the Page Setup group, select Breaks > Next Page .
Move your cursor to the end of the area you want to rotate and repeat the steps above. Then, place your cursor in the area you want to rotate.
In the Page Setup group, select the Page Setup dialog box launcher (the small arrow in the lower-right corner of the group).
In the Page Setup dialog box, select the Margins tab.
In the Orientation section, select the orientation you want the section to have, Portrait or Landscape . Toward the bottom of the dialog box, in the Apply to dropdown menu, select This section . Select OK .
The selected section now reflects the orientation you chose.
Let Word Do It For You
You'll save mouse clicks if you let Word insert the section breaks for you. However, when you use this method, the breaks may not end up exactly where you want them. So, make sure you're careful when selecting the elements (paragraphs, images, tables, etc.) you want in the new layout orientation.
Select all the text, images, and pages that you want to switch to the new orientation.
On the ribbon, select Layout . In the Page Setup group, select the Page Setup dialog box launcher (the small arrow in the lower-right corner of the group).
In the Orientation section, select the orientation you want the section to have, Portrait or Landscape. In the Preview section, in the Apply to dropdown menu, choose Selected text . Select OK .
You may need to perform some formatting adjustments to make the text look the way you want in the new orientation.
Select Layout > Orientation and select the orientation you'd like.
Select the paragraph or page you want to change. Then, choose PAGE LAYOUT > Page Setup . Select Portrait or Landscape > Apply to > Selected text .
Get the Latest Tech News Delivered Every Day
- How to Insert Different Page Orientations in Word 2013
- How to Add Advanced Headers and Footers in Word
- How to Vertically Align Text in Microsoft Word
- How to Rotate Text in Word
- How to Insert a Page in Word
- How to Insert a Document in Word
- 3 Ways to Delete a Blank Page in Word
- How to Add Line Numbers to a Microsoft Word Document
- How to Insert a Column Break in Word
- How to Create a Thumb Index for a Word Document
- How to Use Google Docs Page Break
- How to Insert a Page Break in Word
- How to Create Your Own Certificates With Word Templates
- How to Make Google Docs Landscape
- How to Apply a Border to a Section of Your Word Doc
- Hyperlinks, Bookmarks, and Cross-References in Microsoft Office
How to Change the Page Orientation to Landscape in Word
Need to fit wider content in your Word document? Learn how to easily switch to landscape orientation for a perfect layout.
Key Takeaways
- Use the landscape orientation in Microsoft Word to fit wider content like tables and images.
- You can change the orientation of your entire document or just one page based on your needs.
- Always back up your document before making formatting changes in case of errors.
Switching between portrait and landscape in a Word document can make all the difference for wide tables or images. Here's a straightforward solution to changing the orientation of an entire document or just a specific page in Microsoft Word. Thus, ensuring your content fits neatly and looks great.
How to Change a Document's Orientation in Microsoft Word
To change the orientation of a Word document from portrait to landscape, follow these steps:
- Open the document you intend to change the layout of.
- Click the Layout tab in the Ribbon.
- In the Page Setup group, click the Orientation button.
How to Change the Orientation of One Page in Word
To change the orientation of a specific page(s) in a document, follow these steps:
- Select the content (text, images, or tables) on the page(s) you want to reorient.
- Select Landscape under Orientation and choose Selected text in the dropdown menu next to Apply to .
That's all. Microsoft Word will change the orientation of only the page(s) with the selected content, while preserving the layout of the rest of the document. Just like Microsoft Word, you can change the orientation of an Excel document using our guide linked here.
The landscape orientation is shorter than the portrait layout. If a page in a portrait layout is packed with content, changing the orientation to landscape might spread its content across two pages, altering the layout of both pages instead of just one.
Before you modify your Word document's formatting , make sure to create a backup of the file. A backup can be handy if something goes wrong with your document formatting, and you unintentionally save changes.
How to change orientation of one page in Word
To change the page orientation for whole document Word, on the Layout tab, in the Page Setup group, click Orientation :

From the Orientation dropdown list, choose the orientation you need:

To change the orientation of one page , or a few pages of the document, do the following:
1. Select the text of the page or of the several pages for which you want to change the page orientation.
2. On the Layout tab, in the Page Setup group, click Margins :

Select Custom Margins... from the Margins dropdown list:

3. In the Page Setup dialog box, on the Margins tab:
- In the Orientation group, choose Portrait or Landscape orientation,
- In the Apply to list, choose Selected text :

4. Click OK .
- Microsoft Word automatically inserts section breaks before and after the text that has the new page orientation. If you write a book or a long report and your document is already divided into sections, you can click in the section (or select multiple sections), and then change the orientation only for the sections that you have chosen:

- The option Selected text in the Apply to list appears only if there is selected text in the document.
See also this tip in French: Comment changer l'orientation d'une page dans Word .
Please, disable AdBlock and reload the page to continue
Today, 30% of our visitors use Ad-Block to block ads.We understand your pain with ads, but without ads, we won't be able to provide you with free content soon. If you need our content for work or study, please support our efforts and disable AdBlock for our site. As you will see, we have a lot of helpful information to share.

How to use different page orientations inside one document
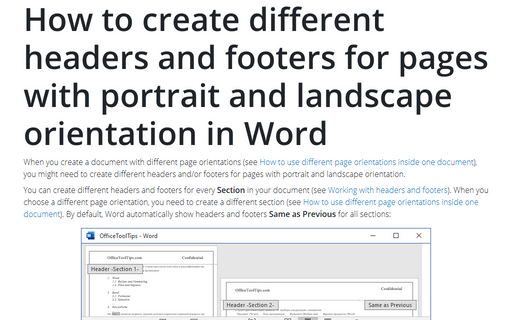
How to create different headers and footers for pages with portrait and landscape orientation in Word
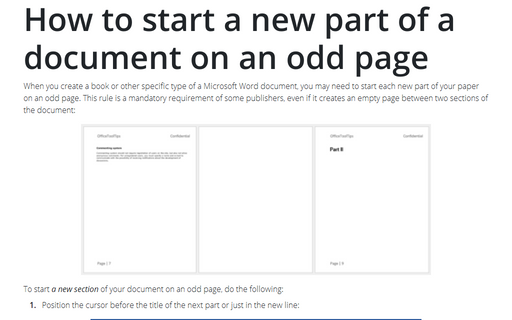
How to start a new part of a document on an odd page

Print with landscape orientation in Word
Change the page orientation for a document.
Click or tap in the document.
Go to Layout > Orientation , and then select Landscape .
Go to File > Print .
Under Settings , make sure the orientation box says Landscape Orientation .
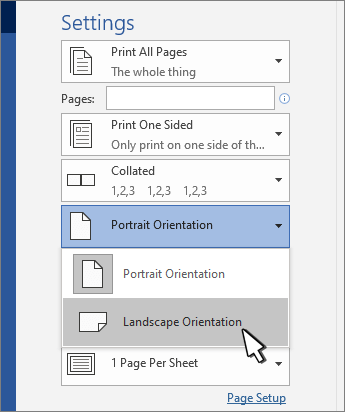
Select Print .
Change the orientation for specific pages
Select all the text on the pages you want to change.

Under Orientation , select Portrait or Landscape .
Next to Apply to , choose Selected text , and then select OK .

On the File menu, select Print .
Change orientation from cursor forward
Click or tap where you want to start the new page orientation.
Next to Apply to , select This point forward .

Select OK .
Change the orientation for a specific section
To change the orientation for a specific section, your document must be divided by section breaks. Learn how to add section breaks .
Double-click the section break that follows the section you want to change.

Select Margins .
Under Orientation , choose Portrait or Landscape .
Next to Apply to , choose This section , and then select OK .
On the Layout tab, choose Orientation , and then select Portrait or Landscape .

On the Format menu, select Document .
Select Page Setup at the bottom of the dialog box.
Next to Orientation , choose the orientation you want, and then select OK .
Change the orientation for all pages after the cursor
Select Page Setup , choose the orientation you want, and then select OK .

Click Page Setup .
On the File menu, choose Print .
Important: If you need printer troubleshooting or driver information, see your printer’s manual or the printer manufacturer’s website.

Need more help?
Want more options.
Explore subscription benefits, browse training courses, learn how to secure your device, and more.

Microsoft 365 subscription benefits

Microsoft 365 training

Microsoft security

Accessibility center
Communities help you ask and answer questions, give feedback, and hear from experts with rich knowledge.

Ask the Microsoft Community

Microsoft Tech Community

Windows Insiders
Microsoft 365 Insiders
Was this information helpful?
Thank you for your feedback.
Rotating a Single Page on Microsoft Word
- Small Business
- Setting Up a New Business
- Open a Small Business
- ')" data-event="social share" data-info="Pinterest" aria-label="Share on Pinterest">
- ')" data-event="social share" data-info="Reddit" aria-label="Share on Reddit">
- ')" data-event="social share" data-info="Flipboard" aria-label="Share on Flipboard">
Adding a Vertical Gradient to Text in GIMP
How to make a break in excel, how to extract text from a pdf to word.
- How to Change Default Indentation in Outlook
- How to Count Characters in Your OpenOffice Documents
When you use Microsoft Word's Orientation option from the ribbon to rotate a page, the entire document conforms to your selection. This is an obvious problem if you're just trying to rotate a chart in the middle of your document, for example, but, you can optionally rotate a single page by accessing the Page Setup dialog.
Using Page Setup
Highlight any text on the page you wish to rotate. It doesn't matter what you highlight, but if you don't highlight anything, the appropriate selection does not appear in the Page Setup dialog. Open this dialog by clicking the small arrow at the bottom right of the Page Setup group on the Page Layout tab. On the Margins tab, select either "Portrait" or "Landscape" from the Orientation section to rotate the page. Click the "Apply to" drop-down menu, choose "Selected Text" and then click "OK" to apply the rotation only to the page where the selected text appears.
- Microsoft: Rotate a Page to Landscape or Portrait Orientation
C. Taylor embarked on a professional writing career in 2009 and frequently writes about technology, science, business, finance, martial arts and the great outdoors. He writes for both online and offline publications, including the Journal of Asian Martial Arts, Samsung, Radio Shack, Motley Fool, Chron, Synonym and more. He received a Master of Science degree in wildlife biology from Clemson University and a Bachelor of Arts in biological sciences at College of Charleston. He also holds minors in statistics, physics and visual arts.
Related Articles
How to rotate a slide in powerpoint, can you change the size of text in a blog post on tumblr, how to rotate the text on a pdf file, how to estimate cash flow of a project, how to rotate the page in excel 2007, how to make diagonal text in word, how to add a facebook page gadget on blogspot, how to wrap text in microsoft excel 2003, how to import a pdf into pages, most popular.
- 1 How to Rotate a Slide in PowerPoint
- 2 Can You Change the Size of Text in a Blog Post on Tumblr?
- 3 How to Rotate the Text on a PDF File
- 4 How to Estimate Cash Flow of a Project
Stack Exchange Network
Stack Exchange network consists of 183 Q&A communities including Stack Overflow , the largest, most trusted online community for developers to learn, share their knowledge, and build their careers.
Q&A for work
Connect and share knowledge within a single location that is structured and easy to search.
How do I rotate a page/table in Word?
I have a label template, and I wish to print it in landscape view. I can certainly rotate the text in each cell to accomplish my aim, however, I'm then typing everything sideways. It would be very convenient if I could also rotate the page to landscape (along with the table), so that I'm now using the labels naturally in the rotated orientation. Is there a way to do this?
- microsoft-word
You'll have to change the page orientation of the document itself first, then resize the elements. I'm afraid I don't think there is an automated way of rotating all elements to keep their orientation, you'll probably have to move them around yourself.

An alternative solution would be creating a new label template in landscape mode:
click the 'Label' field ("Microsoft, 1/2 Letter" etc):

Select the label you want to base it on, then click 'new label':

Set the page size to A4 Landscape (or whichever other format you want, if not specified use 'custom'), and add the number of rows and columns available on your label sheet.

This'll result in a label template you can keep reusing.
- Just realised... You're talking about labels, do you use specific label templates? i.e. through mailings -> labels, and then selecting whichever company and type made your label sheet? These work differently. – MiG Jan 13, 2022 at 17:37
- That is what I'm working with, but I'm using address labels, and they expect a portrait feed with horizontal labels. I want to use the label in a vertical orientation. I think you're right though, the only way is to move everything manually. – cjbarth Jan 13, 2022 at 18:31
- There might be a different way of going about this - you'll have to move your labels over, but you could create a new landscape template yourself. I'll add to the post. – MiG Jan 13, 2022 at 22:24
You must log in to answer this question.
Not the answer you're looking for browse other questions tagged microsoft-word templates ..
- The Overflow Blog
- Climbing the GenAI decision tree sponsored post
- Diverting more backdoor disasters
- Featured on Meta
- New Focus Styles & Updated Styling for Button Groups
- Upcoming initiatives on Stack Overflow and across the Stack Exchange network
- Google Cloud will be Sponsoring Super User SE

Hot Network Questions
- What's to stop domain registrars from price gouging renewals?
- How to write a paper with word count limit?
- I left scented candles in a polypropylene container. How do I remove the smell?
- What does It mean to be "clothed with Christ"?
- How would the existence of sapient "Pet Rocks" affect the economy of a medieval kingdom?
- How to add atom attribute molecule for each layer in LAMMPS?
- How to say politely not to doze off during progress meeting?
- What is a word for battery "longevity"?
- Beginner: Solder won’t flow onto thermostat tabs
- Do you say "my car is high on fuel" as a counterpart of "my car is low on fuel"?
- Factoring through projective modules is an equivalence relation
- Segmentation of a network at branches from one complex boundary polygon
- Security implications of increasing sudo timeout in terminal
- Paper authorship conflict: Advisor wants his name on a research paper he didn't contribute to
- Why is remote desktop very slow when host monitor is off unless HDMI cable is used?
- Can I mark a local variable as safe for a single file only?
- What were the major things that caused TCP/IP to become the internet standard protocol?
- How to stop an AirTag from beeping when not near iPhone?
- Are agent explanations better than non agent explanations?
- Difference between 当て and はず
- Why isn't there financial safety if I am arrested illegally?
- How important was the US steel industry to the allies during World War II?
- Why are the solar prominences visible during a total solar eclipse - orange? Is the sun orange?
- Expand a 2d curve into a 3d path curve with a fixed axis of rotation?
- PDF Tools PDF Editor Create, edit or convert PDF PDF Converter Convert from/to PDF offline
- Partner Affiliate Earn high commission Reseller Join EaseUS reseller program
- Resources Change PDF Page Size Remove Signature from PDF Remove Password from PDF Convert EPUB to PDF
- Support Support Center Guides, License, Contact Download Download installer Chat Support Chat with a Technician Pre-Sales Inquiry Chat with a Sales Rep
EaseUS PDF Editor
All-in-one PDF editing software to create, convert and manage PDF files easily.
- Convert PDF files to Excel, Word, PowerPoint, images or vice versa
- Easily merge, split, insert, extract, delete pages from PDF documents
- Edit, compress, encrypt, sign, OCR, annotate PDF files with ease
How to Rotate Page in Word [Updated in 2024]
Melissa Lee updated on Mar 19, 2024 | Home > PDF Knowledge Center | min read
There could be many times that you receive a file with the wrong page orientation. To view and read the pages conveniently, you'd want to rotate them as you need. Now Microsoft Word provides the orientation option to rotate the pages, but it can be tricky. So, there is a different way to rotate pages in MS Word. You can rotate a page with "Page Setup" dialog without affecting other pages. To know the detailed steps to rotate page in Word documents, keep reading this post.
How to Rotate Page in Word Documents
Advantages of using a pdf over a word document, how to manage a document in pdf format.
You can rotate a page in Word by using the program's "Page Setup" option. It will take only a few steps to complete the task. Here are the steps to rotate a page in Word.
Step 1. Open the Microsoft Word document on your PC. Select the page content you want to rotate by pressing "Ctrl" + "C" on your keyboard. If you don't select the page content, nothing will appear on the page setup dialog.
Step 2. Go to the menu bar and click on the "Layout" option. You will easily find the "Page Setup" group.
Step 3. In the "Page Setup", click on the "Orientation" tab. Here, you'll see two options "Portrait" or "Landscape." Choose one according to your requirements.
Step 4. After choosing the orientation of your page, head over to the last section. Click on "Apply To", and a drop-down will appear. Now, click on "Selected Text" from the options and press "OK". You will get your page rotated.
Microsoft Word is essential software that allows users to type in their own content and create new documents. This software offers many tools that you can use to make your files more satisfying. For example, if you want an appealing Word document, you can insert an image into it and customize that image freely, including copy, replace, and rotate it.
However, every coin had two sides, and the Word document also comes with some disadvantages. Word has speed issues as compared to other competing products because of fewer updates. The Program has a crowded interface, and sometimes it's hard for you to find out the tool when you need it badly. That is why more and more prefer to use PDF files in their business instead of Word.
The PDF file format has nifty advantages over the Word file format, and for many good reasons. This post will discuss why it's better to use PDFs than Word documents.
PDF files are safe and secure. You can attach a password to the file so that an unauthorized person can't access it.
- Convenience
With a good PDF editor, you can decrease the PDF file size without losing quality. It will be convenient to store it and send it to others.
- Reliability
Many people prefer PDF file format because of the authenticity it offers. No matter where you're viewing the file, it'll always display the data accurately. Your data will remain secure whether you used images, tablets, or vector graphics in PDF files.
- Compatibility
Those times were troublesome when users received files that weren't compatible with the software installed on their devices. PDF files are compatible as the user can open them in any PDF reader on Windows PC or Mac.
Last but not least, PDF files also enable the users to merge and combine files with ease.
EaseUS PDF Editor is a great program that can help you deal with different tasks for managing a PDF document. Whether you want to edit PDF files or convert PDF files, the software offers many excellent tools.
If you're having difficulty managing PDF files or images, EaseUS PDF Editor would be of great help. The software can help you combine different files into one PDF and organize it as per your needs. The PDF files won't take much space on your PC as you can reduce the file size without losing the data.
For those who want to manage their PDF files securely, EaseUS PDF Editor would be an ideal choice. The software allows you to protect the files with a password. So that only people who get the permission can access the files.
Main Features:
- Create PDFs from documents like Word, Excel, and PowerPoint
- Remove password from PDF
- Annotate PDF files with lines, arrows, and shapes
- Sign the PDF with e-signature
- Convert PDF to JPG Windows 10
Those are not all its features, and if you want to know more about it, you need to download it and try it on your own. Click on this button and get it for free now.
Free Download Windows 11/10/8/7
Steps to Edit a PDF with EaseUS PDF Editor:
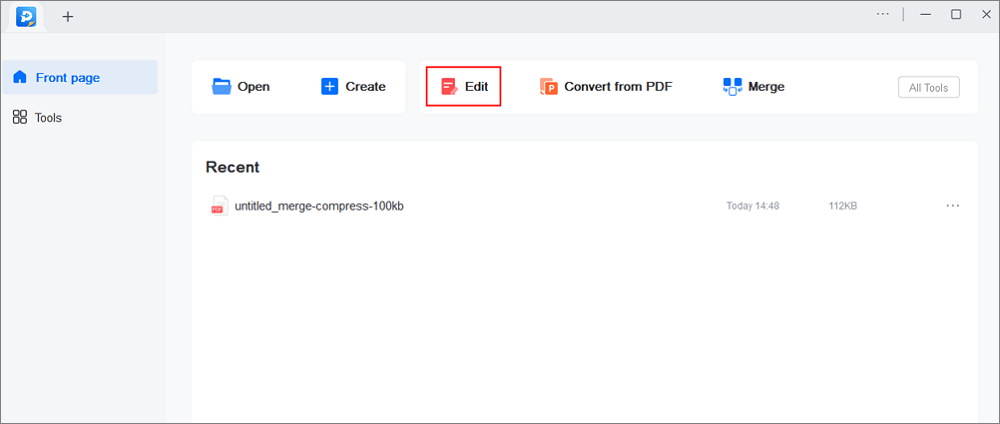
Step 1. Launch EaseUS PDF Editor and click "Edit". Then, choose and import the PDF you want to edit from your computer.
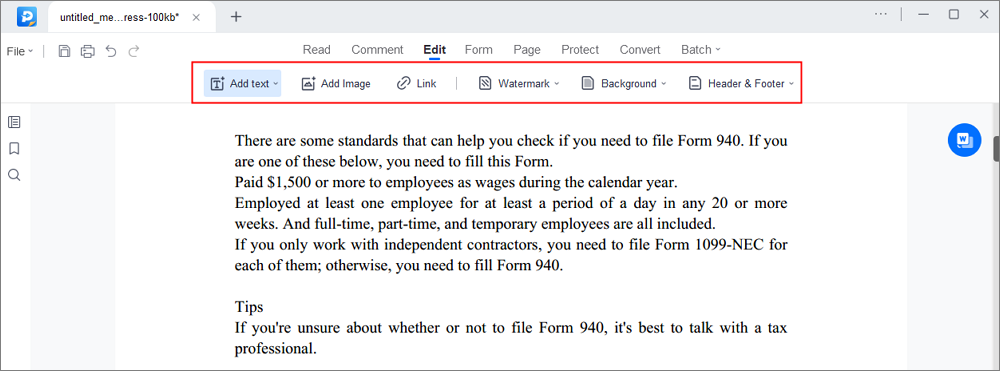
Step 2. There are many editing tools. You may choose to add text, image, link, watermark, set background, edit header & Footer, etc. Always remember to save the changes with the "Save" button.
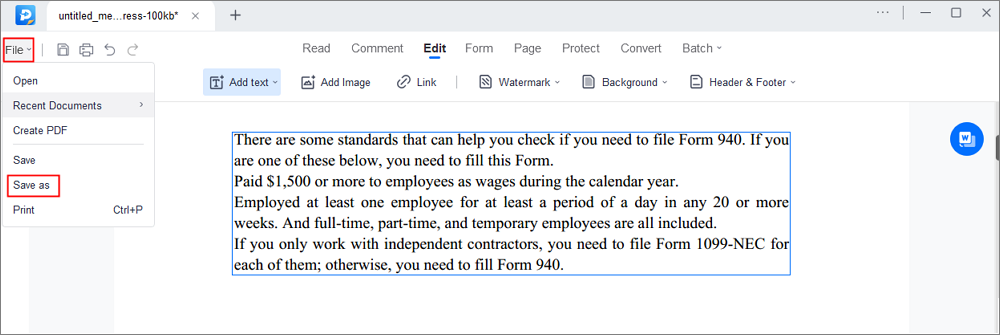
Step 3. When you made all the changes, click "File" > "Save as" to save it to your computer. You need to give the new PDF file a name and file location, and click "Save" in the next window to finish.
The Bottom Line
Whether you work on Windows or Mac, you can deal with the problem of rotating pages in Word. The steps mentioned above to rotate pages will save time and are easy to follow.
For people who want to create quality documents, PDF is a great format to start. And Windows users can manage their PDF files using the EaseUS PDF Editor. As the name suggests, the software is a go-to program for various PDF-related tasks.
About the Author
Melissa Lee
Melissa is a sophisticated editor for EaseUS in tech blog writing. She is proficient in writing articles related to screen recording, voice changing, and PDF file editing. She also wrote blogs about data recovery, disk partitioning, and data backup, etc.
Read full bio
You May Be Also Interested in
![word rotate paper How to Open PDF in Pages on Mac [Step-by-step Guide]](https://pdf.easeus.com/images/pdf-editor/en/related-articles/17.jpg)
How to Open PDF in Pages on Mac [Step-by-step Guide]

How to Convert PDF to Keynote Easily in 2024

Export WhatsApp Chat to PDF in 2024✅
Success, thanks for submitting!
- Refund Policy
- Terms & Conditions
- Do Not Sell
Copyright © 2004 - 2023 EaseUS. All rights reserved.
- PRO Courses Guides New Tech Help Pro Expert Videos About wikiHow Pro Upgrade Sign In
- EDIT Edit this Article
- EXPLORE Tech Help Pro About Us Random Article Quizzes Request a New Article Community Dashboard This Or That Game Popular Categories Arts and Entertainment Artwork Books Movies Computers and Electronics Computers Phone Skills Technology Hacks Health Men's Health Mental Health Women's Health Relationships Dating Love Relationship Issues Hobbies and Crafts Crafts Drawing Games Education & Communication Communication Skills Personal Development Studying Personal Care and Style Fashion Hair Care Personal Hygiene Youth Personal Care School Stuff Dating All Categories Arts and Entertainment Finance and Business Home and Garden Relationship Quizzes Cars & Other Vehicles Food and Entertaining Personal Care and Style Sports and Fitness Computers and Electronics Health Pets and Animals Travel Education & Communication Hobbies and Crafts Philosophy and Religion Work World Family Life Holidays and Traditions Relationships Youth
- Browse Articles
- Learn Something New
- Quizzes Hot
- This Or That Game New
- Train Your Brain
- Explore More
- Support wikiHow
- About wikiHow
- Log in / Sign up
- Computers and Electronics
- Microsoft Office
- Microsoft Word
2 Quick Ways to Rotate or Adjust Text in Microsoft Word
Last Updated: March 20, 2024 Fact Checked
Using a Computer
Using mobile.
This article was co-authored by wikiHow staff writer, Rain Kengly . Rain Kengly is a wikiHow Technology Writer. As a storytelling enthusiast with a penchant for technology, they hope to create long-lasting connections with readers from all around the globe. Rain graduated from San Francisco State University with a BA in Cinema. This article has been fact-checked, ensuring the accuracy of any cited facts and confirming the authority of its sources. This article has been viewed 1,504,222 times. Learn more...
Do you want to adjust the text positioning in Microsoft Word? If your text is in a text box, you can easily adjust the text rotation with a few simple clicks. You'll be able to rotate by 90 degrees, 270 degrees, or another specific position. This wikiHow will show you how to turn and rotate text in Microsoft Word using your Windows or Mac computer, and iPhone, iPad, or Android.
Things You Should Know
- Create a text box with your text. Click "Shape Format" → "Text Direction" → "Rotate all text 90°".
- To manually adjust the position, click the text box. Click and hold the curved arrow icon and drag it clockwise or counter-clockwise.
- On mobile, create a text box and tap it. Tap and hold the curved arrow icon to drag it to a new position.

- You must have a subscription to Office 365 to use the latest version of Microsoft Word.

- Make sure the text box is still selected, otherwise, your text may end up outside of it.

- A drop-down menu will open.

- You can continue to edit your text in the text box. The words will type in the direction set.
- Be sure to save your document if you need to return to it later.

- Click the text box. Icons should appear around it.
- Click and hold the curved arrow icon.
- Drag your mouse clockwise or counter-clockwise to adjust the position.
- Release the mouse to save the position.

- Microsoft Word is available for iOS in the App Store and for Android in the Google Play Store .
- Tap Blank document to open a new document or tap a file to open an existing document.

- Tap Home and select Insert .
- Tap Text Box .
- Enter the text in the text box.

- Tap the text box. Icons should appear around it.
- Tap and hold the curved arrow icon.
- Drag your finger clockwise or counter-clockwise to adjust the position.
- Release your finger to save the position.
Community Q&A
- You can change the font, size, and color of the text that's inside of the text box from the Home tab. Thanks Helpful 0 Not Helpful 0

You Might Also Like

- ↑ https://support.microsoft.com/en-us/office/rotate-text-in-word-66d0ea6d-a26d-40bf-8b3c-3ff8a9f60dc9
About This Article

- Send fan mail to authors
Is this article up to date?

Featured Articles

Trending Articles

Watch Articles

- Terms of Use
- Privacy Policy
- Do Not Sell or Share My Info
- Not Selling Info
wikiHow Tech Help Pro:
Level up your tech skills and stay ahead of the curve
- PDFelement for Windows
- PDFelement for Mac
- PDFelement on Mac App Store
- PDF Reader for Windows
- PDFelement for iPhone/iPad
- Get from App Store
- PDFelement for Android
- Get from App Google Play
- PDF Scanner for iPhone
Cloud & SDK
- Document Cloud
- PDFelement Pro DC
- PDFelement SDK

Educational Users
- Annotate PDF
- Combine PDF
Personal Users
- Convert PDF
- Compress PDF
- Organize PDF
Professional Users
- AI PDF Editor
- Extract Data from PDF
- Password Protect PDF
- eSign PDFs Legally
PDF Solutions for
- Mac Software
- OCR PDF Tips
- Online PDF Tips
- Edit PDF like Word
- PDF Converter Tips
- PDF Compressor Tips
Why PDFelement
- Customer Stories
- PDF Software Comparison
- Contact Support
- PDFelement for iOS
- InstaScan for iPhone
Explore More
- Reviews See what our users say.
- Free PDF Templates Edit, print, and customize free templates.
- PDF Knowledge PDF-related information you need.
- Download Center Download the most powerful and simple PDF tools.
- Download Download Pricing Pricing
How to Rotate Page in Word

Audrey Goodwin
2024-03-22 16:31:28 • Filed to: Word Tips and Tricks • Proven solutions
Page rotation seems to be a very simplistic process while working on Word. However, while being in professional fields, it is imperative to maintain the quality and appearance of the content created. It not only involves managing the content but how it is formatted. Rotating documents is one of these many procedures executed to achieve this in the documents. Many people are not aware of making multiple changes with the feature as they rotate page in Word . This article introduces readers explaining how to rotate page in Word. The article shall also focus on how to rotate one page in Word.
The first step to rotating pages in Word involves executing the process across the complete document. If you are looking forward to rotating all the pages across your Word document, you should look into the following steps provided below.
Step 1: Open
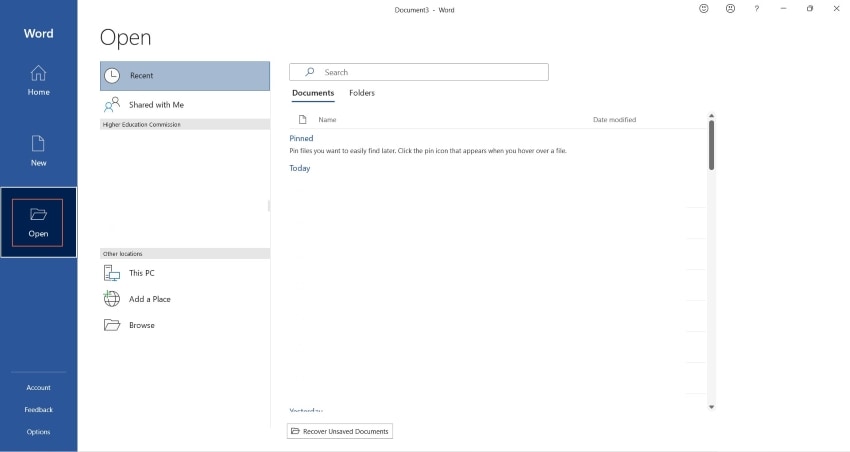
You need to open Microsoft Word on your device. Tap on “Open” on the left side of the window and import the document that requires editing.
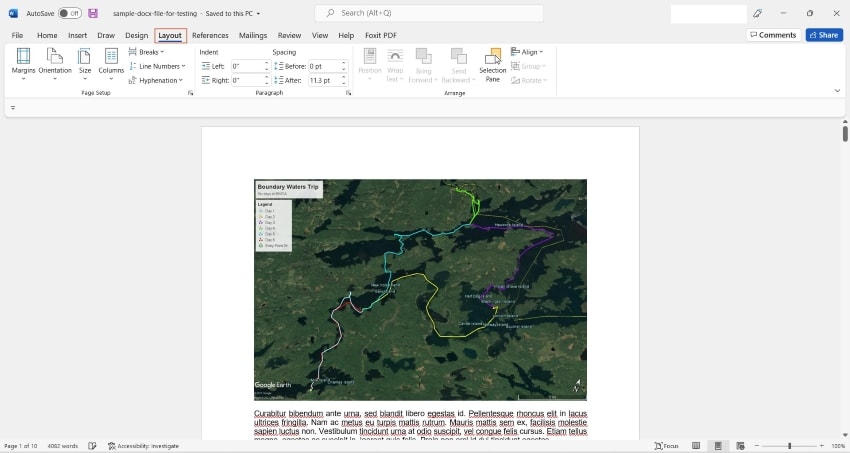
Step 2: Layout
Once the document is opened, proceed to the "Layout" tab present on the top-most menu. A new list of options is open across the menu below.
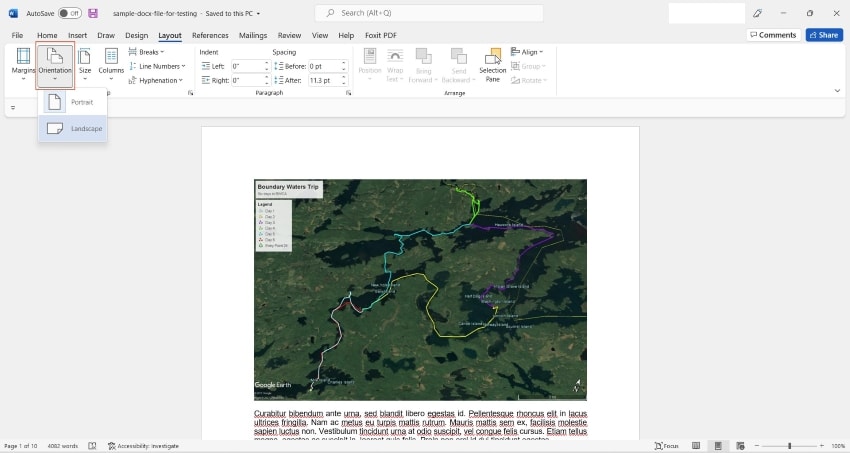
Step 3: Orientation
Select the "Orientation" option from the "Page Setup" section. Select "Landscape" if you wish to change the page orientation from "Portrait" or vice versa.
How to Rotate Only One Page in Word
There are instances where you require to rotate a specific page or a range of pages across a Word file. For many people, it may seem impossible; however, it is actually possible to rotate pages in Word. To understand how to rotate one page in Word , you need to look into the steps displayed as follows.
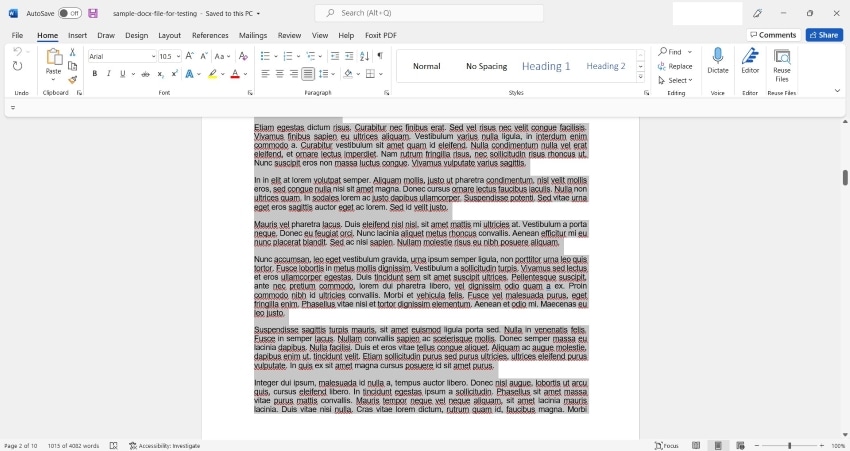
Open the Word document that is to be rotated. Select the specific text that requires a change in orientation. Make sure that all the text across the page is selected.
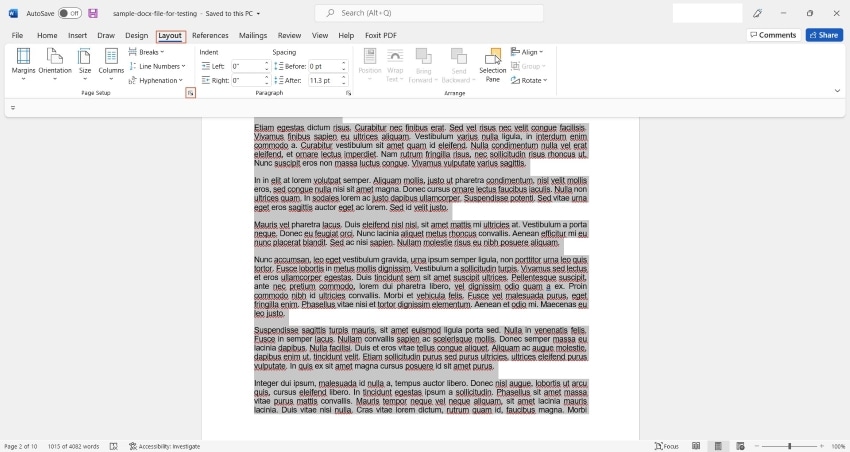
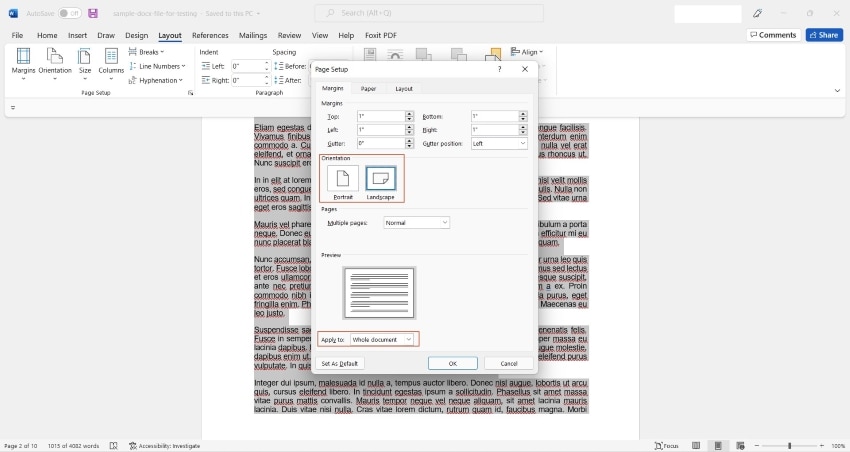
After selecting the text, proceed to the “Layout” tab and select the arrow-type icon on the bottom right of the menu, adjacent to the “Page Setup” section.
Step 3: Apply
A new window opens on the screen. Select the orientation you wish to set for the specific page in the "Margins" section of this window. Once done, change the option of "Whole Document" in the "Apply to:" section to "Selected Text." Tap "Ok" once completed.
How to Rotate Pages in PDF
Step 1: open pdf.
Firstly, open PDF in PDFelement using this "Open PDF" button or drag/drop the file to open.

Step 2: Rotate Pages in PDF
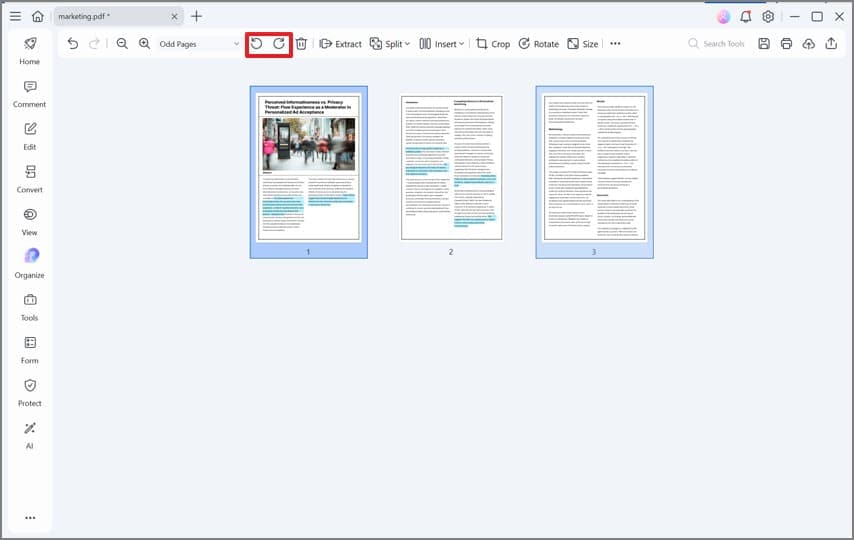
Go to "Page" menu, select the pages you want to rotate, and then choose direction of rotation by clicking the icon named "Left rotate" or "Right rotate". Or you can just right click the page to be rotated and choose "Rotate Page".
Step 3: Save Rotated Pages
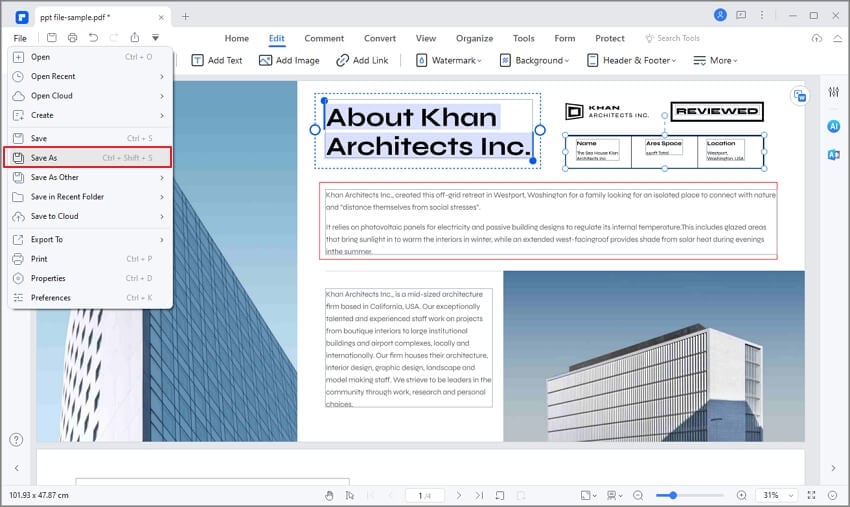
Save the changes by clicking "File" and then "Save" or "Save As".
Advantages of PDF Document
The use of PDF is on the rise and this is attributed to several features and benefits. PDF files have now become the most popular file type that is used to transmit, upload and download files over the internet and elsewhere. The surge in popularity may be surprising to some people but it is not to a lot of people who have used PDF because they know the advantages. Firstly, PDF is independent of software, hardware, or even operating system as they can be read from all systems, they are optimally sized and this means that that they can be smaller in size without losing quality and they are well secured since they cannot be edited by anyone.
Many individuals and small businesses have been waiting for a day where they could have an affordable PDF editing tool that can give them a total PDF solution. Considering the fact that before the coming of Wondershare PDFelement - PDF Editor , PDF users have been torn between using the ever expensive available editing tools and the free online ones which really do nothing because they lack serious features at the end of the day end up wasting their time.
The good news is that PDFelement is nowhere. These new capabilities cover the editing workflows and the Form creation and processing capabilities. With PDFelement, you now have smarter, faster text editing capabilities not found in the earlier versions. The platform is so easy to the extent that users can now edit any document as they do in Microsoft ® Word and this is across both Mac and Windows platforms.
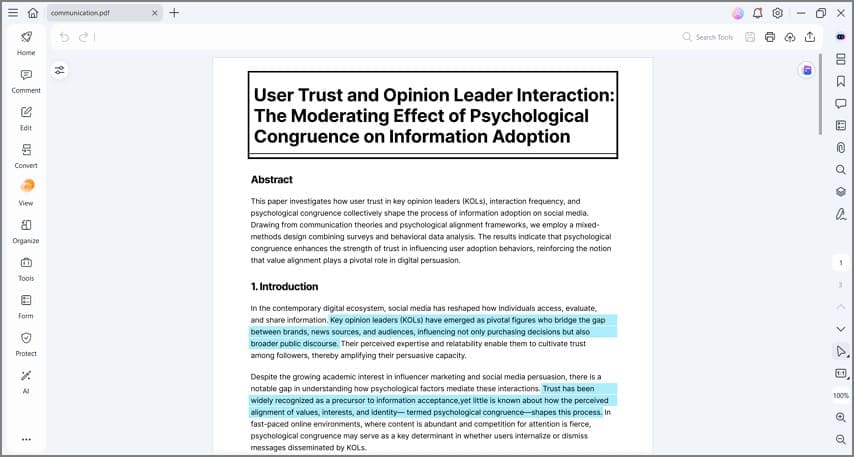
Flexible Editing Features: Edit any document, paragraph by paragraph, article by article. Add and remove contents, images, link to a document, adjust the visible page area, add watermark, and edit background the way you want it. All these tasks are just too easy with the PDFelement as you do not require additional training to make use of it perfectly. The platform is easy to navigate with the Select, Hand, and Edit buttons visible at the top left side of the platform.
Other capabilities on PDFelement include:
- Ease of Creating Fillable PDF Forms- Turns nonfillable forms made in Word, excel, etc. into fillable PDF documents with just one click.
- Export Data from Scanned PDFs- Converts paper documents into office-friendly files using advanced OCR technology.
- Export Form Data into Excel- Within seconds, you can extract PDF form data into an excel sheet.
To crown it all, you can try out PDFelement both in Windows and Mac before you commit your hard-earned funds. But make no mistake, you are going to be "Wowed" after the test and will surely make PDFelement your own. In the end, PDFelement delivers pro-level features that would have cost you a lot using other editors. Get more how-to articles of PDFelement here.
Free Download or Buy PDFelement right now!
Buy PDFelement right now!
chief Editor
Speak Your Mind
Related articles.
- How to View Comments in Word
- Steps to Link Text Boxes in Word
- 5 Best Word Editing App
- Print Word Document without Comments
- How to Insert Citation in Word

Contribute to the Microsoft 365 and Office forum! Click here to learn more 💡
April 9, 2024
Contribute to the Microsoft 365 and Office forum!
Click here to learn more 💡
- Search the community and support articles
- Microsoft 365 and Office
- Search Community member
Ask a new question
mailing labels in landscape mode in Word
Report abuse.
Start with a 5164 label and in the Label Options dialog, click on Details... and then make changes to the label details as shown below, and then click on OK and it will then be added to the label list for Other/Custom label vendors:

19 people found this reply helpful
Was this reply helpful? Yes No
Sorry this didn't help.
Great! Thanks for your feedback.
How satisfied are you with this reply?
Thanks for your feedback, it helps us improve the site.
Thanks for your feedback.
Replies (1)
Question info.
- Norsk Bokmål
- Ελληνικά
- Русский
- עברית
- العربية
- ไทย
- 한국어
- 中文(简体)
- 中文(繁體)
- 日本語
Set paper size, page orientation, and margins in Pages
Choose a paper size or create a custom paper size, choose portrait or landscape page orientation, and set the margins for your Pages document on Mac, iPhone, or iPad.
Set paper size, page orientation, and margins on Mac
In Pages on Mac, you can set the paper size, page orientation, and margins for your document.
Set paper size, page orientation, and margins
Pages templates use the most common margin, orientation, and paper size settings, but you can change these settings in the Document sidebar.
To change the paper size, click the pop-up menu in the sidebar that shows the current paper size, then choose an option.
If you want to print your document on 8.5” x 11” printer paper, choose US Letter.
If you don't see the size you want in the menu, you can create a custom paper size .
To change the orientation of your page, click the orientation you want under Page Orientation.
To change document margins in a word-processing document, click the arrows or enter values in the fields next to Top, Bottom, Left, and Right in the Document Margins section. For the Blank template, all margins are automatically set to one inch. If you're using a different template, margin sizes vary. You can also adjust paragraph margins for specific paragraphs to indent them from document margins.
You can use the vertical ruler to make sure your margins and other items are where you need them in your document:
Choose Pages > Settings (or choose Pages > Preferences on macOS Monterey or earlier).
Click Rulers, then select "Show vertical rulers whenever rulers are shown."
Choose View > Show Ruler.
Learn how to add pages to your document , add page numbers that automatically adjust as pages are added or deleted, and work with templates .
Create a custom paper size
If the paper size you want to use for your document doesn't appear in the Paper Size pop-up menu, you can create a custom paper size. This is helpful if you need to create documents with the same paper size.
Choose File > New, then choose a template to create a new document.
Choose File > Page Setup.
Click the Paper Size pop-up menu, then choose Manage Custom Sizes.
Double-click the new untitled name in the list, then type a name for your custom size.
Type the width and height of the paper in the Width and Height fields.
Set the print margins, then click OK.
Click OK to close the Page Setup window.
When you print, your document will print using the custom paper size.
When setting up your document, it’s also helpful to use rulers , set tab stops and add and format sections . Some templates have predetermined sections that you can add to or delete.
Set paper size, page orientation, and margins on iPhone or iPad
Open your document in Pages.
Tap Document Options, then tap Document Setup.
To change the page orientation, tap Portrait or Landscape.
To change paper size, tap an option under Paper Size:
If you want to print your document on 8.5” x 11” printer paper, choose Letter.
If you want a custom size, tap Custom Size, then enter the dimensions. When you print, your document will print using the custom paper size.
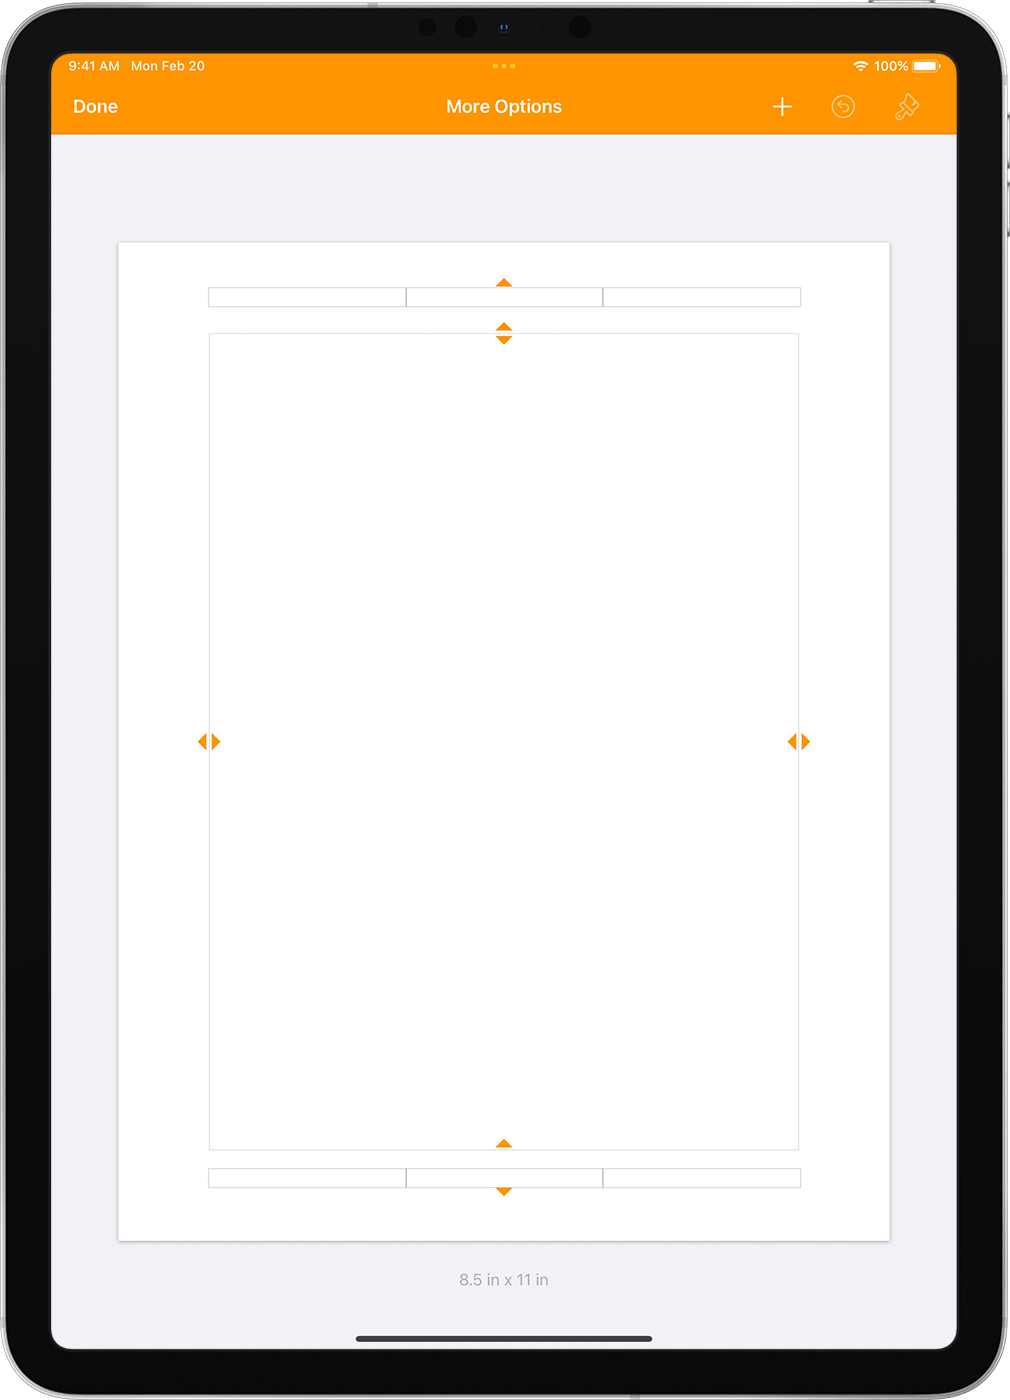
To adjust the margins for a word-processing document, tap More Options, then drag the arrows around the body text box. You can change the margins of all sides of the page. Tap Done to save your changes.
Set paper size and orientation in Pages for iCloud
Set document margins in Pages for iCloud
Choose a document type in Pages
Add page numbers and text to headers and footers in Pages
Explore Apple Support Community
Find what’s been asked and answered by Apple customers.
Contact Apple Support
Need more help? Save time by starting your support request online and we'll connect you to an expert.

IMAGES
VIDEO
COMMENTS
Change part of a document to landscape. Select the content that you want on a landscape page. Go to Layout, and open the Page Setup dialog box. Select Landscape, and in the Apply to box, choose Selected text. Choose either portrait (vertical) or landscape (horizontal) orientation for all or part of your document.
Step 4: Apply to Selected Text. Click on the drop-down menu next to "Apply to" and choose "Selected text.". This step ensures that only the page you want to rotate will be changed, leaving the rest of your document in its original orientation. Be sure to highlight the text or place your cursor on the page you want to rotate before doing ...
HOW TO ROTATE A PAGE IN WORD 90 DEGREES - TURN PAGE HORIZONTAL LANDSCAPE VIEW // Learn to turn one page within your document horizontal without having to ent...
Things You Should Know. Rotate the whole document on the Layout tab by selecting Orientation > Landscape. You can rotate a single page by inserting a section break at the top of the page. Once you add a section break, you can click the cursor on the desired page and go to Layout > Orientation > Landscape. Method 1.
In this quick tutorial I'll show you how to rotate the orientation of just one page within a Microsoft Word document, so that you can have a page set to land...
Make sure your cursor is located on the page before you want to make the change and then go to the "Layout" or "Page Layout" tab. Click the drop-down box beside "Breaks" and choose ...
Go to the Layout tab and click the arrow on the bottom right corner of the Page Setup section of the ribbon. This opens the Page Setup dialog box. Confirm that you're on the Margins tab. Below Orientation, choose "Landscape." Then at the bottom, click the Apply To drop-down box and choose "Selected Text." Click "OK."
Manual: Select Layout on the Ribbon. Go to Page Setup > Breaks > Next Page. Pick an area. Set the margins and choose your orientation. Auto: Go to Layout > Page Setup > Page Setup > Margins. Set the orientation and Apply to the Selected Text in the preview. This article explains how to insert a page with a different orientation from the rest of ...
Select the content (text, images, or tables) on the page (s) you want to reorient. Navigate to the Layout tab in the Ribbon and click the downward pointing arrow button in the bottom-right corner of the Page Setup group. Select Landscape under Orientation and choose Selected text in the dropdown menu next to Apply to . Finally, click OK .
From the Orientation dropdown list, choose the orientation you need: To change the orientation of one page, or a few pages of the document, do the following: 1. Select the text of the page or of the several pages for which you want to change the page orientation. 2. On the Layout tab, in the Page Setup group, click Margins :
On your smartphone or tablet, open the document where you want to change the page orientation in Microsoft Word. Tap anywhere in the document, and a menu appears. Then, tap Select All. Select All in Microsoft Word for Android and iOS. Bring up the full menu with editing options for Word, on the bottom part of the screen.
Intructions on how to change the orientation of a single page:1. Click at the top of your page.2. Click Layout3. Click Breaks4. Click Next Page5. Click Orien...
Hi vikramsp. The only way to do that and at the same time rotate the text contained on that page would be to put that text in a text box on that page . . . You can then rotate the text 90 degrees counter clock-wise (Press Shift while rotating) then change that page's orientation.
Double-click the section break that follows the section you want to change. Select Margins. Under Orientation, choose Portrait or Landscape. Next to Apply to, choose This section, and then select OK. On the File menu, select Print. Important: If you need printer troubleshooting or driver information, see your printer's manual or the printer ...
On the Margins tab, select either "Portrait" or "Landscape" from the Orientation section to rotate the page. Click the "Apply to" drop-down menu, choose "Selected Text" and then click "OK" to ...
click the 'Label' field ("Microsoft, 1/2 Letter" etc): Select the label you want to base it on, then click 'new label': Set the page size to A4 Landscape (or whichever other format you want, if not specified use 'custom'), and add the number of rows and columns available on your label sheet. This'll result in a label template you can keep ...
This video guides about how to change orientation of one page in word.To learn how to rotate page in MS Word, simply follow the step-by-step guide.Changing o...
Here are the steps to rotate a page in Word. Step 1. Open the Microsoft Word document on your PC. Select the page content you want to rotate by pressing "Ctrl" + "C" on your keyboard. If you don't select the page content, nothing will appear on the page setup dialog. Step 2.
Click "Shape Format" → "Text Direction" → "Rotate all text 90°". To manually adjust the position, click the text box. Click and hold the curved arrow icon and drag it clockwise or counter-clockwise. On mobile, create a text box and tap it. Tap and hold the curved arrow icon to drag it to a new position. Method 1.
How to Rotate Only One Page in Word. There are instances where you require to rotate a specific page or a range of pages across a Word file. For many people, it may seem impossible; however, it is actually possible to rotate pages in Word. To understand how to rotate one page in Word, you need to look into the steps displayed as follows.
I show you how to rotate one page in word and how to rotate single page in word in this video. For more videos like how to change page to landscape in word a...
Answer. Doug Robbins - MVP Office Apps & Services (Word) MVP. Replied on July 15, 2015. Report abuse. Start with a 5164 label and in the Label Options dialog, click on Details... and then make changes to the label details as shown below, and then click on OK and it will then be added to the label list for Other/Custom label vendors: Hope this ...
Click the Paper Size pop-up menu, then choose Manage Custom Sizes. Click the Add button. Double-click the new untitled name in the list, then type a name for your custom size. Type the width and height of the paper in the Width and Height fields. Set the print margins, then click OK. Click OK to close the Page Setup window.