- PRO Courses Guides New Tech Help Pro Expert Videos About wikiHow Pro Upgrade Sign In
- EDIT Edit this Article
- EXPLORE Tech Help Pro About Us Random Article Quizzes Request a New Article Community Dashboard This Or That Game Popular Categories Arts and Entertainment Artwork Books Movies Computers and Electronics Computers Phone Skills Technology Hacks Health Men's Health Mental Health Women's Health Relationships Dating Love Relationship Issues Hobbies and Crafts Crafts Drawing Games Education & Communication Communication Skills Personal Development Studying Personal Care and Style Fashion Hair Care Personal Hygiene Youth Personal Care School Stuff Dating All Categories Arts and Entertainment Finance and Business Home and Garden Relationship Quizzes Cars & Other Vehicles Food and Entertaining Personal Care and Style Sports and Fitness Computers and Electronics Health Pets and Animals Travel Education & Communication Hobbies and Crafts Philosophy and Religion Work World Family Life Holidays and Traditions Relationships Youth
- Browse Articles
- Learn Something New
- Quizzes Hot
- This Or That Game New
- Train Your Brain
- Explore More
- Support wikiHow
- About wikiHow
- Log in / Sign up
- Hobbies and Crafts
- Paper Craft
- Paper Planes

How to Create a Paper Helicopter
Last Updated: January 4, 2024 Fact Checked
This article was co-authored by Amy Guerrero . Amy Guerrero is an Arts and Crafts Specialist and the Owner of Sunshine Craft Co., a crafting studio based in Phoenix, Arizona. Amy specializes in macrame, DIY crafting, and teaching fiber arts. She offers monthly in-person and online workshops along with having developed a range of DIY craft kits for at-home projects. Amy holds a BS in Industrial Design from Philadelphia University. She worked as a graphic designer before starting her own business. Sunshine Craft Co. is a creative hub that offers a wide range of workshops, tools, and resources for any craft project to inspire creativity and community engagement. This article has been fact-checked, ensuring the accuracy of any cited facts and confirming the authority of its sources. This article has been viewed 522,376 times.
Want to make a fun, simple, and quick project with a child but don't have a lot of supplies or ideas? Try making a paper helicopter. When you drop this helicopter from your hand it will slowly spin until it reaches the floor. You will only need a piece of paper to make it but you will see how much fun can be had with a very simple toy.
Making a Paper Helicopter

- Large index cards, usually 5 inches (12.7 cm) by 7 inches, work really well for this project. Use one if you already have some at home.
- These measurements do not need to be totally exact, so don't worry if you are a little bit off. What matters is that the paper is much longer than it is wide.
- Is possible, draw your lines using a ruler so your cuts are straight.
- This is not totally necessary but may help you to make a good helicopter.
- If you drew the guide lines on your paper, be sure to stop cutting at least a half an inch before you get to the middle line. This will assure that you do not accidentally cut too far.
- Once again, the guide lines you might have drawn on your paper may help you. When cutting these horizontal cuts, be sure not to cut so far that you reach the middle line. It's best to only cut halfway to the middle line on both sides you are cutting. This will assure that the bottom of your helicopter doesn't get cut off!
- Once you have folded and creased them, open these flaps up halfway. They have now formed the wings of your helicopter.
- Experiment by dropping it from different heights. See if the way it flies changes.
- Use various sizes of paperclips, see which works best.
- You can also cut the wings, so they are thinner or thicker, to get the best flight.
Making a Really Simple Small Paper Helicopter
- The width of your index card will now be one quarter what it was to begin with.
- Once both sides are folded, open them both up halfway. These folds have now formed the wings of your helicopter.
Community Q&A
- Before you cut your paper you can decorate it, so that your finished helicopter is fun and colorful. [8] X Research source Thanks Helpful 0 Not Helpful 0
- Bend the wings upwards slightly. This will make it spin sooner. Thanks Helpful 0 Not Helpful 0
- Make sure the paper is not used, messed up, or crinkled. It messes up the spin. Attach it to a helicopter shaped paper. Never throw it. Use a launcher. Thanks Helpful 0 Not Helpful 0

- Be careful when using scissors. Try not to cut yourself or others. Thanks Helpful 24 Not Helpful 35
Things You'll Need
- Pair of scissors
- Piece or paper or an index card
You Might Also Like

- ↑ https://www.sfi.ie/site-files/primary-science/media/pdfs/col/paper_helicopters.pdf
- ↑ https://www.jpl.nasa.gov/edu/learn/project/make-a-paper-mars-helicopter/
- ↑ https://www.nasa.gov/wp-content/uploads/2015/05/make_a_paper_mars_helicopter.pdf
- ↑ https://www.exploratorium.edu/explore/science/activity/roto-copter
- ↑ https://www.exploratorium.edu/science_explorer/roto-copter.html
About This Article

To create a paper helicopter, cut a piece of paper to be 2.5 inches wide and 7 inches long. Next, fold your paper in half lengthwise, crease it, unfold the paper, and lay it flat. Then, cut halfway down the crease and make 2 small cuts in toward the center line. Fold both of the bottom sections down in opposite directions, crease them, and open these flaps up halfway to form the wings of your helicopter. Lastly, slide a paperclip on the bottom of the helicopter to hold the bottom flaps closed and give your helicopter a spin! For tips on drawing guidelines to help you make clean folds, read on! Did this summary help you? Yes No
- Send fan mail to authors
Reader Success Stories
Sharon Russell
Oct 2, 2017
Did this article help you?
Olivia Jensen
Sep 20, 2017
Arham Gillani
Dec 5, 2016
Feb 2, 2017
Mar 29, 2017

Featured Articles

Trending Articles

Watch Articles

- Terms of Use
- Privacy Policy
- Do Not Sell or Share My Info
- Not Selling Info
Get all the best how-tos!
Sign up for wikiHow's weekly email newsletter
Comprehensive guide to paper helicopter design and step-by-step template assembly instructions.
Learn how to make a paper helicopter that flies and explore how varying material, wing length, body dimensions, and other design parameters could potentially influence your paper helicopter's ability to fall slowly., paper helicopter design.
Hover over the image or table to explore the various parts of the paper helicopter template. A summary of these components is provided in Table 1 , while a detailed explanation can be found in the PAPER HELICOPTER DESIGN EXPLAINED section below.

Paper helicopter template assembly instructions
- Put reinforcement tape, if needed.
- Cut along solid lines.
- Fold along dotted lines.
- Attach paper clip(s).
Note that it's more convenient to attach the reinforcement tape before cutting as it simplifies the assembly process. Additionally, the orientation of the blades and blade tips is crucial for optimal performance - ensure that the "Top Side" mark appears on top of the blade and the blade tips point upwards.
Paper helicopter design explained
Wing length, body length, paper clips, folded wings, taped wings, middle body height, fold offset, body layers, spin direction, print labels.
- Manufacturer - link to the website, www.paperhelicopterexperiment.com . It's imperative to note that if similar templates are found elsewhere, with or without these specified markings, there may be a suspicion of theft or unauthorized reproduction, which would likely constitute a violation of intellectual property rights. We urge users to get in touch with us should they come across such violations, see the About page.
- Batch ID - this number is assigned at the paper helicopter factory upon order placement.
- Helicopter ID - the last two digits of the paper helicopter's serial number. A paper helicopter ID is unique within a batch (since each order consists of at most 25 helicopters). Paper helicopter ID can be used e.g. for trials randomization.
Disclaimer: The descriptions provided for the various components of the paper helicopter template, such as wing length, wing width, and especially the body height (referred to as the "cabin"), are designed to infuse a sense of complexity and imagination into the task at hand. While some factors have a physical basis, others, like the notion of a cabin providing space for pilots, are used metaphorically to engage the reader. The objective of the exercise is to explore the potential impact of these factors on the paper helicopter's flight time through the use of design of experiments methodology. The real-world physical interpretations of some factors may not align perfectly with the descriptions provided, and part of the project's challenge lies in understanding and optimizing these factors or combinations of these factors to achieve optimal performance.
Copyright © 2024 Dmitrii Zholud. All Rights Reserved.
The paper helicopter PDF templates from this website are for the exclusive use of the individuals who have purchased them. Purchasers are granted the right to use the paper helicopter PDF templates for personal educational purposes only, and are not permitted to copy, redistribute, share, or republish the paper helicopter PDF templates in any form. All content on this website, including images and the paper helicopter PDF templates, is the authentic and original creation of Dmitrii Zholud. Copying, reproducing, or distributing any material from this website, including images and the PDF templates that are provided for free use, is strictly prohibited.
Paper Helicopter Experiment
This post uses affiliate links that may earn VistaThink a commission at no additional cost to you. Read more in the Private Policy . Thanks for your support!
A paper helicopter experiment is a fantastic hands-on, and low-budget way for students to explore cause and effect relationships in experimental design. These models offer teachers easy STEM activities with paper and generate authentic data in the classroom. In fact, there are so many paper helicopter materials, lessons, and instructions online, it’s hard to know where to start!
Simple quantifiable scenarios can be examined and several criteria for success can be defined and explored. Paper helicopters provide educators with easy-to-do experiments to help students learn the scientific method.
The ASTC Science World Society concisely explains the many levels of inquiry teachers can offer students when conducting paper helicopter experiments. These levels of investigation range from more structured to less structured which suits various grade levels and abilities.
Paper helicopter lessons with more structure would generally target lower grade levels. More open assignments are suitable for independent students at the higher grade levels where the teacher acts as a facilitator. Teachers of all experience levels can take advantage of the learning opportunities provided by experimenting with paper helicopters.
Paper Helicopter Lesson Outline
The specific paper helicopter lesson outlined in this blog post targets students in upper elementary and middle school. It can be extended above and below these grade levels as well. This lesson covers methods of data gathering and provides teachers with easy-to-use activity resources.
This paper helicopter experiment is a simple introduction to experimental design and will target this testable science question:
Does changing the blade length of a paper helicopter affect how long it stays in the air? (Keep reading, however, this question needs a bit of clarification.)
The NGSS Standards do apply! Examples:
- 3-5-ETS1-3 Engineering Design – Plan and conduct an investigation collaboratively to produce data to serve as the basis for evidence, using fair tests in which variables are controlled and the number of trials considered.
- MS-ETS1-2 Engineering Design – Evaluate competing design solutions using a systematic process to determine how well they meet the criteria and constraints of the problem.
How Does a Helicopter Work?
In basic terms, an actual helicopter is a type of aircraft that creates lift (an upward force of air) with horizontally spinning rotor blades. These rotor blades are sometimes referred to as simply rotors or blades.

The physics of paper helicopters are different from real helicopters. Traditional paper helicopters do not use a power source to spin their blades and create lift. These models are typically created with two blades and dropped from a fixed height and spin as they descend.
Paper helicopters spin because of the earth’s gravity, lift, and configuration of the rotors. When dropped, the helicopter’s mass experiences gravity, and it naturally falls to the floor which causes paper blades to bend slightly upward due to lift. The lift force of the air pushes on each of the blades equally but in opposite directions, horizontally and vertically. As a result of the horizontal equal, opposite, and offset forces, the helicopter spins around as it descends.
The helicopter descends due to unbalanced forces: The weight of the helicopters is greater than the lift force of air.
2BrokeScientists studied the airflow around a helicopter and found that there were high-pressure areas under the blades. This high pressure results in equal and opposite opposing forces that cause the spin.
Framing the analysis in terms of Newton’s Third Law of Motion , a pair of equal and opposite forces acting horizontally under each blade and on the body of the paper helicopter cause rotation.
Simple Paper Helicopter
A simple paper helicopter can be made easily at home or school. Multipurpose U.S. letter-size printer paper (8.5 x 11 inches, 21.6 x 27.9 cm) works well for the model. The design is simple to make with only a few cuts and folds, and its parts can be easily adjusted to examine changes regarding flight behavior. To conduct the paper helicopter experiment, we should know the parts first!
Paper Helicopter Parts
The paper helicopter parts are similar to a real helicopter’s parts. The common paper helicopter with two blades has four major parts:
Blades – These two parts are identical rectangles arranged vertically at the top of the helicopter. These parts are sometimes called rotors , blades , rotor blades , wings , or even propellers . The blades provide the lift and are factors that cause the helicopter to spin. The width of the two blades together equals the width of the paper template used to make the helicopter. The thickness of the blades is one layer of paper.
Body – The top of the body of the paper helicopter connects to the blades. The body shape is a rectangle and is perpendicular to the blades. It is located between the blades and the tail. It is as wide as the paper template used to make the helicopter. The thickness of the body is one layer of paper.
Tail – The top of the tail connects to the bottom of the body. The thickness of the tail is three layers of paper. The width of the paper helicopter tail is one-third the width of the template. The tail provides the paper helicopter flight stability.
Stabilizer – The stabilizer is essentially the bottom tip of the tail. A horizontal fold in the tail creates the stabilizer. This fold also provides the paper helicopter flight stability by shifting the model’s center of mass downward.
Independent, Dependent, and Controlled Variables
The paper helicopter experiment requires that you control some variables, change others, and look for cause and effect. A variable is a characteristic or quantity that can be measured or counted in an experiment. Most experiments for this age group account for three kinds of variables: independent, dependent, and controlled.
Independent variables are manipulated by the researcher. These variables are changed and studied to determine if they are the cause in a cause-and-effect relationship. Independent variables are not influenced by other variables. Sometimes independent variables are not manipulated by the researcher but monitored to see how their changes may affect other variables. For example, time (seconds, days, years) is an independent variable that can be tracked to see how it may affect other variables (e.g., the growth of a plant).
Dependent variables are what researchers observe, measure, or count in an experiment. Changes in dependent variables depend on various influences. Independent variables are factors that may change a dependent variable.
Why are Variables Important in an Experiment?
That’s the point of an experiment: To find out what may or may not influence a dependent variable! These types of variables are the “effect” in a cause-and-effect relationship.
Controlled variables are variables that the researcher does not allow to change. The variables are maintained to be constant so that they do not influence any of the dependent variables. Variables that are kept the same for every measurement and test in an experiment, ensure that the dependent variables produce data that are as accurate as possible.
Knowing variables’ roles helps researchers be systematic with their observations, accurately collect relevant data, and be logical with their scientific thinking.
How Do You Make a Paper Helicopter Fall Slower?
A common problem to examine is how to make a paper helicopter fall slower. In other words, many paper helicopter designers want to know how to make a paper helicopter that stays in the air the longest. A simple two-rotor paper helicopter is a good design choice to study this common problem.
The researcher can manipulate any of the four helicopter parts to determine what factors affect the flight time of a paper helicopter. By adjusting a part of the helicopter, researchers are manipulating the independent variable to determine if this change affects the time the helicopter stays in the air (time in the air is the dependent variable). Parts of the helicopter that do not change from a standard model to an adjusted model, are considered control variables.
Paper Helicopter Variables
To ensure that testing is fair so that cause-and-effect data are a reliable source of information, the three types of paper helicopter variables need to be defined. For our paper helicopter experiment example, the independent, dependent, and controlled variables are identified as follows.
I ndependent Variables :
- blade length (which changes the body height)
- body height (which changes when the rotor blade length is adjusted)
Dependent Variable :
Controlled Variables (Helicopter Parts):
- rotor blade width and thickness
- body width and thickness
- tail length, width, and thickness
- stabilizer length, width and thickness
Controlled Variables (Materials and Conditions):
- paper size and mass
- drop height
- drop start time
From a persnickety perspective, there are more variables to control like the angle between the blades and the body. This should be 90 degrees by the way. How deep you go as far as what variables are controlled–what you look at–depends on the students’ age group and experience.
By taking into account the types of variables in an experiment, our actually scientific inquiry question for the paper helicopter experiment is:
Does changing the blade-length-to-body-height ratio of a paper helicopter affect how long it stays in the air?
It’s important to note that since paper helicopters easily offer many cause-and-effect relationships to explore, students may eagerly start changing parts of the helicopter to see what happens–how flight changes. Once students get their hands on a template, without focused guidance, teachers may see many different configurations, and helicopters being thrown up into the air.
The time to be creative with designs to more freely explore flight dynamics is after a procedural scientific experiment is conducted.
Paper Helicopter Experiment Considerations
If you are conducting the paper helicopter experiment in a classroom, you will need to set up a testing area. Two paper helicopter models are needed as well to explore how to make a paper helicopter fall slower. It may be easiest to refer to each model by their blade lengths: shorter-blade model and longer-blade model.
The student tester usually holds the completed helicopters away from their body and just above their head while standing on a chair. This drop distance is sufficient for comparing two different helicopters. Make sure there is enough clearance between the tester and any objects or observers to not interfere with the paper helicopters’ descent (i.e., to avoid introducing unwanted variables).
Having multiple students drop the two different helicopter types from the same height and at the same time can provide a simple and solid experimental design.
Here’s an example from NASUWT showing three students testing paper helicopters at once:
How Many Trials Should a Good Experiment Have?
What is a trial in a science experiment? A trial is one of many tests that make up the experiment itself. For example, each time you drop the paper helicopter from a fixed height to see if increasing the blade length increases how slowly a paper helicopter falls, you are conducting a trial.
We want a good experiment–one that offers fair testing and produces not only accurate data but lots of accurate data. The more trials we have, the more evidence we have that random factors are not influencing the outcome.
Other ways to think about the role of trials are: How many trials in an experiment should you conduct to get valid results? How many trials are required to validate a hypothesis? We want the results to truly represent what we are investigating.
So, how many trials should a good experiment have? As many as possible. Three trials minimum seems to be a consensus. With easy-to-test paper helicopters, students can conduct many trials in a short period of time. Multiple helicopters can be tested at once as well. With a design such as the aluminum foil boat investigation , fewer trials are possible because it takes more time to prepare and test.
How to Collect Data in a Science Experiment
If you can gather as much good data as possible without too much logistic fuss, do it! For example, provide half of your class with the shorter-blade paper helicopter template. The other half of the class would be given the longer-blade helicopter template.
When ready, the two helicopter groups could be separated, face each other, hold up their models at the same height, and then drop them simultaneously. Repeat as needed. Students should keep their hands and arms as far away from the helicopters as possible, holding the tips of the blades before release.
Videos of the experiment offer easily reviewable data that would offer a more sound determination to see if longer or shorter rotor blades cause a paper helicopter to stay in the air the longest. Each model type should be clearly identified especially if relying on videos for data analysis.
Other Ways to Collect Data
There are other ways to collect data while ensuring a fair test. Establishing a fixed height from the floor (i.e., controlling the distance-flown variable) can be done by hanging a small mass from the classroom ceiling with thread.

One successful set-up I have used has a paper clip on one end of a thread with a piece of blue painter’s tape on the other end. The top end with the paper clip is tucked into the metal drop ceiling frame grid, and the piece of blue paper tape has enough mass to hang down properly and be easily visible. I prefer not to have a paper clip hanging on the lower end because if hit or smacked for “fun” it could hurt someone’s hand, stick in the ceiling, etc.
A distance of 200 cm from the tape to the floor is a good distance to establish as a controlled variable for dropping and observing paper helicopters. Place six to eight of these paperclip-thread systems around the classroom to create testing spaces for groups of two to four students.
Paper Helicopter Flight Times
The easiest and quickest way to determine which paper helicopter model falls more slowly may be the aforementioned multi-copter drop method with or without a video recording. So, if you need a quick and easy STEM activity, go this route.
Another way to perform a fair test requires a stopwatch. After setting up the six to eight test stations around the classroom with the paperclip, thread, and blue painter’s tape, each group of students can perform the 200 cm drop and time the helicopter models multiple times.
If students do, say, ten trials for each model they should have sufficient data to minimize random factors. Each group’s ability to time the drops accurately will factor into the integrity of the results. Measuring the paper helicopters’ times over a fixed distance will also produce data that can be analyzed mathematically. Some examples of mathematical analyses are:
- represent and interpret data in a chart or graph
- measures of center (e.g., average time for each model)
- measures of variability (e.g., differences in trial times for each model)
Other Simple Paper Helicopter Launcher Ideas
There are other ways to launch paper helicopters rather than dropping them from your hand. For example, two meter sticks, side-by-side, can launch two to four helicopters at once. Two people are needed to hold the ends of the meter sticks. A bit of practice helps to keep the sticks level at a prescribed height and to separate them at the same time for launching.

With the two-stick method, you can launch even more helicopters at once using longer pieces of wood. Consider using two 1 in. x 2 in. x 8 ft. furring strip boards for launching seven to ten paper helicopters at once with just two people.
Paper Helicopter Experiment Lesson Plan
The focus of this paper helicopter investigation explores how the independent variables of blade length and body height together affect time aloft. Remember that, the blade length cannot be changed without changing the body height (unless we change the mass, which is a variable we are controlling). This means for both types of helicopters:
Blade length (shorter) with body height (taller) = equals = Blade length (longer) with body height (shorter)
And, as a reminder, our paper helicopter scientific inquiry question is:
Lesson Plan Parts and Documents
Paper Helicopter Template – There are four free printable pdf templates (8.5 x 11 inches, 21.6 x 27.9 cm). Each helicopter template is one page with the two types of helicopters:
- paper helicopter template with instructions and labels
- paper helicopter template with instructions (no labels)
- paper helicopter template with minimal instructions
- paper helicopter template no instruction (just cutting and folding lines)
Choose the template that makes the most sense for your students. Generally, the lower the grade level, the more instruction, and guidance are needed to make a paper helicopter.
Teacher Lesson Plan Outline
Grade Levels 4 – 7 (8 – 10 works too!)
Time How deep do you want to go? What is the grade level? Are you looking for a quick STEM activity or a long-term stem project ? Consider 45 minutes (one class) to 90 minutes (two classes), and keep in mind any extension activities.
Scientific Inquiry Question Does changing the blade-length-to-body-height ratio of a paper helicopter affect how long it stays in the air?
If you’re working with lower grade levels, or want to simplify the question, pose it like this: Does changing the blade length of a paper helicopter affect how long it stays in the air?
Standards Connections Common Core Next Generation Science Standards (NGSS)
Elementary School
- 3-5.Engineering Design
- 3-PS2-1 Motion and Stability: Forces and Interactions
Middle School
- MS.Engineering Design
- MS-PS2-2 Motion and Stability: Forces and Interactions
Materials and Set-Up (for the multi-test station method)
- Stopwatch (can be an online version )
- 8.5 x 11.5-inch paper helicopter template – one per group
- Group of two to four students students
- Six to eight helicopter test stations spaced about the classroom. A testing station consists of a thread hanging from the ceiling vertically that ends with a piece of tape 200 cm above the floor.
Paper Helicopter Experiment Lesson Documents
If you would like additional instructional activities to extend the paper helicopter activity and go deeper into learning, check out the Paper Helicopter Experiment (purchase link) resources at TPT !
You’ll find all the resources shared in this blog post, plus :
- teacher lesson presentation with custom graphics
- paper helicopter experiment report template
- pre/post test
- reading comprehension activity
- thinking routines writing activity
- group member role definitions
- vocabulary definitions for the paper helicopter experiment
- vocabulary definitions for the scientific method
Books about Paper Helicopters and Flight
Check out this captivating collection of books (paid links) that explore the fascinating world of flight. From exploring the mechanics of flight and the similarities between living creatures and machines to unraveling the story of the Wright Brothers, these books provide an immersive experience of the wonders of aviation.
Planes, Jets and Helicopters: Great Paper Airplanes Make your own fantastic flying paper aircraft! Instructions to fold paper, fly, and troubleshoot paper planes and helicopters from standard 8.5 by 11-inch paper. No glue, scissors, or tape required! Two dozen fold and fly designs with fold-by-fold illustrated instructions.
Science Comics: Flying Machines: How the Wright Brothers Soared A National Science Teachers Association Best STEM Book Winner in 2017! A delightfully illustrated comic about the history of the Wright brothers told by Katharine Wright Haskell, the younger sister of American aviation pioneers Wilbur and Orville Wright.
Planes, Gliders and Paper Rockets: Simple Flying Things Anyone Can Make–Kites and Copters, Too! A STEM-oriented book for older students who have access to tools and want to go beyond paper designs. Great for going deep into making hands-on, DIY flying crafts with everyday materials!
Paper Helicopter Experiment Summary
Teachers, are you searching for an engaging and cost-effective STEM activity to foster scientific thinking among your upper elementary and middle school students? High school students as well can benefit from the paper helicopter experiment!
This exciting low-budget DIY activity encourages students to develop essential scientific thinking skills by creating hypotheses, gathering relevant data, and interpreting results to draw conclusions. As a result, they will gain invaluable skills that will serve them well in future studies.
But the benefits don’t stop there! The paper helicopter experiment also allows students to explore various scientific concepts such as gravity, lift, and air resistance. Students will better understand these essential scientific principles by testing different blade sizes.
The paper helicopter experiment’s simplicity and low-cost nature make it an excellent starting point for Year 1 students to learn the MYP Design Cycle . Students can better understand the design process by identifying a problem related to helicopter design, creating a prototype, testing and evaluating their design, and communicating their findings.
To get started, check out the free resources in this blog post and on TPT ! They offer step-by-step instructions for building a paper helicopter and comprehensive tips for conducting the experiment and analyzing results. So what are you waiting for? Get started on this exciting hands-on STEM activity today!
Screen-Free STEM Activities for Kids and Children's Books - myworldtheirway.com
HOW TO MAKE A PAPER HELICOPTER
Let’s explore the principles of flight through a simple yet mesmerizing experiment: creating paper helicopters. Through this experiment, children will delve into the intriguing world of aeronautics, discovering how the size, shape of the blades, and the weight of a paper helicopter can influence its spinning motion.
( Disclosure : Some of the links below are affiliate links, meaning, at no additional cost to you, I will earn a commission if you click through and make a purchase)
MATERIALS YOU’LL NEED
Before we take flight, let’s gather the necessary materials for this experiment:
- Paper clips
CRAFTING YOUR PAPER HELICOPTER
Start by obtaining a strip of paper measuring approximately 20 cm in length and 4 cm in width.
Cut the paper along the dotted lines to create a specific shape for your paper helicopter.
Fold the longer length of the paper strip and secure it in place using glue. This will form the main body of your helicopter.
Congratulations! Your paper helicopter is now ready to take to the skies. Hold it at a height and release it, observing its captivating motion.
Flight Dynamics: The Science Behind the Spin
As your paper helicopter gracefully descends, let’s explore the scientific principles governing its flight. The phenomenon can be understood as follows:
- The force of gravity pulls the helicopter downward, setting the stage for its aerial adventure.
- Simultaneously, the air rushes out from under the wings of the helicopter in all directions.
- This rush of air creates resistance, pushing up against each blade of the helicopter individually.
- As a result, a fraction of the initial thrust is redirected sideways, generating a horizontal push and initiating the mesmerizing spinning motion of the helicopter.
RELATED POST : SPINNING GHOST COPTER
the Impact of Weight: Adding Paper Clips for a Thrilling Twist
Now, let’s introduce an intriguing twist to the experiment by exploring the influence of weight on the paper helicopter’s flight dynamics. By attaching paper clips to the bottom of the helicopter, we can observe fascinating variations in its spinning speed.
- Attach a paper clip to the lower end of the helicopter’s body.
- As the weight of the paper clips increases, several interesting phenomena occur:
- The increased weight reduces air resistance, allowing the helicopter to descend more rapidly.
- Simultaneously, the added weight enhances the impact of air hitting the helicopter’s blades, causing them to spin at a faster rate.
This captivating interplay of weight, air resistance, and spinning motion serves as a captivating illustration of the scientific principles governing flight dynamics.
Embracing Science and Adventure: Inspiring Young Minds
The paper helicopter experiment exemplifies the fusion of scientific exploration and adventure. By engaging in this experiment, children not only gain insight into the fundamentals of flight but also develop critical thinking skills and an appreciation for the wonders of science.
At MyWorldTheirWay , we encourage educators and parents to incorporate interactive and engaging activities like the paper helicopter experiment to ignite a passion for STEM (Science, Technology, Engineering, and Mathematics) subjects in children. By fostering a love for science at an early age, we empower young minds to reach new heights of knowledge and discovery.
FINAL THOUGHTS: Soar to New Horizons with the Paper Helicopter Experiment
In conclusion, the paper helicopter experiment unlocks a world of scientific wonder, allowing children to witness firsthand the magic of flight. By manipulating the size, shape, and weight of their paper helicopters, young aviators embark on a thrilling exploration of aerodynamics.
We invite you to join us in nurturing the innate curiosity and creativity of children through captivating experiments like the paper helicopter. Let’s inspire a new generation of scientists, engineers, and innovators who will shape our world with their boundless imagination and scientific prowess.
Bon voyage on your flight of discovery!
Reader Interactions
Leave a reply cancel reply.
Your email address will not be published. Required fields are marked *
This site uses Akismet to reduce spam. Learn how your comment data is processed .
About the Designer

Follow on Instagram

Subscribe for Updates
Get Your ALL ACCESS Shop Pass here →
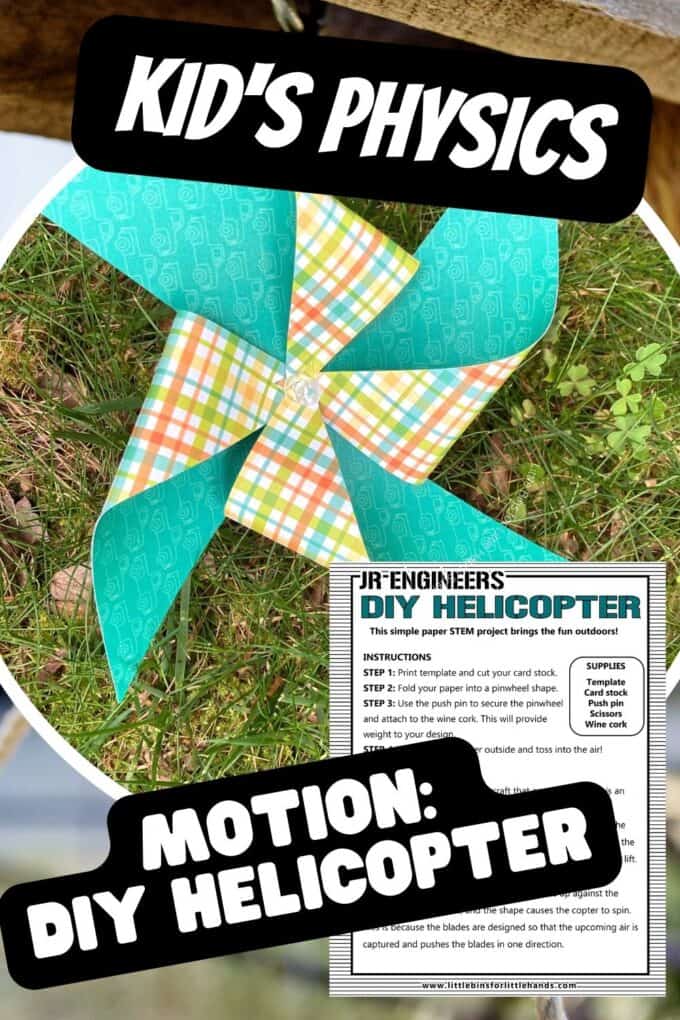
How To Make A Paper Helicopter
Make a paper helicopter that actually flies! This is an awesome paper STEM challenge for young kids and older ones too. Learn about what helps helicopters rise into the air, with a few simple supplies. We have loads more fun STEM activities for you to try!
HOW TO MAKE A PAPER HELICOPTER
HELICOPTER STEM CHALLENGE
Get your kids thinking about forces in motion with this simple helicopter activity. STEM for kids doesn’t need to be complicated or expensive.
Some of the best STEM activities are also the cheapest! Keep it fun and playful, and not make it too difficult that it takes forever to complete.
Take up the challenge to make a paper helicopter with our easy paper helicopter instructions below. Find out what makes a helicopter able to lift off from the ground and see how high and long you can get your own paper helicopter to fly.
ALSO CHECK OUT: Physics Acti vities For Kids

STEM QUESTIONS FOR REFLECTION
These questions for reflection are perfect to use with kiddos of all ages to talk about how the challenge went and what they might do differently next time around.
Use these questions for reflection with your kids after they have completed the STEM challenge to encourage discussion of results and critical thinking.
Older kiddos can use these questions as a writing prompt for a STEM notebook. For younger kiddos, use the questions as a fun conversation!
- What were some of the challenges you discovered along the way?
- What worked well and what did not work well?
- What would you do differently next time?
CLICK HERE TO GET YOUR FREE PRINTABLE HELICOPTER ACTIVITY!

- Helicopter template

INSTRUCTIONS:
STEP 1: Print the paper helicopter template and cut out the cardstock.

STEP 2: Fold it into a pinwheel shape.

STEP 3: Use the push pin to secure the pinwheel and attach to the wine cork. This will provide weight to your design.

STEP 4: Take your paper helicopter outside and toss into the air! How long can it stay in the air?

THE SCIENCE BEHIND THE PAPER HELICOPTER
Unlike airplanes, helicopters have rotor blades which spin horizontally. It is the spinning of the blades that creates lift, which is an upward force of air.
When your pinwheel helicopter falls it is due to the force of earth’s gravity. Lift and the design of the rotors help it stay in the air.
It naturally falls to the ground which causes the paper to bend slightly upward due to lift. When your paper helicopter falls, air pushes up against the blades, with equal force, and the shape causes the copter to spin. This is because the blades are designed so that the upcoming air is captured and pushes the blades in one direction.
MORE FUN THINGS TO BUILD
Also try one of these easy engineering projects below.
Build your own mini hovercraft that actually hovers.
Be inspired by American mathematician Evelyn Boyd Granville and build a satellite .
Design an airplane launcher to catapult your paper planes.
A good breeze and a few materials are all you need to tackle this DIY kite project.
It’s a fun chemical reaction that makes this bottle rocket take off.
MAKE A PAPER HELICOPTER FOR STEM
Click on the image below or on the link for more easy STEM projects for kids.

~ Projects to Try Now! ~

Ask an Explainer
How do paper helicopters work.
When you make a paper helicopter, you're making a propeller . Tilting the blades will enable the propeller to produce lift by creating faster moving air on the top, which has less pressure than on the bottom. If spun right, the paper helicopter will fly into the air! If dropped from a high point, it will circle gently to the ground.

Quill And Fox
Best Design Studio

Amber Robertson
Amber Robertson is the founder of Quill and Fox. A creative writing studio that helps people find their voice and share their stories. Amber is also a published author, with her first book slated for release in 2020. She loves spending time with her family and friends, reading, writing, and traveling. When Amber was younger, she loved to write short stories and plays. But somewhere along the way, she lost touch with her creativity. It wasn’t until she became a mom that she realized how important it was to share her stories—both the good and the bad—with the people she loves most. That’s when Quill and Fox was born. Amber is passionate about helping others find their voice and share their stories. She believes that every person has a story worth telling, and it’s her mission to help them tell it in a way that is authentic and true to themselves

How to Make a Paper Helicopter: A Step-by-Step Guide
Table of Contents
Are you looking for a fun and easy DIY project for a lazy afternoon? Making a paper helicopter is an excellent way to spend your time and boost your creativity. In this article, we will provide you with a step-by-step guide on how to make a paper helicopter that can fly. Let’s get started!
Materials Needed

Before we begin, let’s gather all the materials we need. Here’s a list of everything you need to make a paper helicopter:
- A4 or letter-size paper
- Markers or colored pencils (optional)
You can use any kind of paper you have on hand, such as printer paper, notebook paper, or construction paper. Tape and paperclips are essential for weighting the helicopter and keeping it balanced while in flight. If you want to add some color to your helicopter, markers or colored pencils are a great addition.
Once you have all the materials, let’s move on to the next section, where we will provide you with a detailed guide on how to make a paper helicopter.
Steps to Make a Paper Helicopter
Step 1: Start by taking a piece of paper and folding it in half lengthwise. Make sure that the edges are aligned correctly, and the crease is sharp.
Step 2: Next, unfold the paper and fold each corner towards the center crease. This will create two diagonal folds that meet in the middle.
Step 3: Fold the paper again along the center crease, this time in the opposite direction. Make sure that the folds are sharp and precise.
Step 4: Take one of the top corners and fold it down to meet the center crease. Repeat this step with the other top corner of the paper.
Step 5: Now, fold the paper in half along the center crease, so the top corners meet the bottom corners.
Step 6: Fold the paper in half again, but this time, fold it widthwise. Make sure the edges are aligned, and the crease is sharp.
Step 7: Cut along the folded edges, stopping at the center crease. This will create four flaps.
Step 8: Fold each flap towards the center crease, making sure that they are all folded at the same angle.
Step 9: Fold the helicopter in half, so the flaps are on top of each other. Secure the flaps with a paperclip.
Step 10: Finally, attach a small piece of tape to the bottom of the helicopter. This will act as a weight and keep the helicopter balanced while in flight.
Congratulations! You have successfully made a paper helicopter. But wait, there’s more! In the next section, we will provide you with some tips and tricks to make your paper helicopter fly even better.
Tips and Tricks
Now that you have made your paper helicopter let’s make it fly better with some tips and tricks. Here are some ways to improve your paper helicopter’s performance:
Adjust the Weight
The weight of your paper helicopter is crucial to its flight. If it’s too heavy, it won’t fly at all, and if it’s too light, it will fly too quickly and crash. To adjust the weight, you can add or remove paperclips. If your helicopter isn’t flying well, try adding more paperclips to the bottom.
Adjust the Flaps
The angle of the flaps on your helicopter can also affect its flight. If the flaps are too flat, the helicopter won’t spin, and if they are too steep, it will spin too quickly and crash. To adjust the flaps, try folding them at different angles until you find the perfect balance.
Add Decorations
Adding decorations to your paper helicopter not only makes it look cool but can also help with its flight. You can draw designs on the paper or attach small pieces of paper to the flaps to add weight and improve stability.
Test Different Heights
The height from which you drop your helicopter can also affect its flight. Try dropping it from different heights and see how it performs. Dropping it from a higher height will give it more time to spin and glide, while dropping it from a lower height will make it spin faster.
By implementing these tips and tricks, you can make your paper helicopter fly better and have more fun with it.
Variations of Paper Helicopters
Now that you know how to make a basic paper helicopter, it’s time to get creative and try different variations. Here are some designs you can try:
Dragonfly Helicopter
The dragonfly helicopter is a unique and fun variation of the basic paper helicopter. To make it, fold the paper as you would for a regular helicopter, but instead of folding the flaps towards the center crease, fold them towards the back. This will create a dragonfly-like shape that spins and flies differently from the regular helicopter.
Double Helicopter
The double helicopter is another exciting variation that involves making two helicopters and attaching them together. To make it, follow the steps to make two regular helicopters, then tape them together at the bottom. When you drop it, both helicopters will spin simultaneously, creating a unique flying pattern.
Pinwheel Helicopter
The pinwheel helicopter is a more complex design that involves cutting the paper into a pinwheel shape. To make it, start by folding the paper in half diagonally, then cut along the folded line. Cut each of the resulting triangles in half again, then fold each corner towards the center. Attach a paperclip to the bottom, and your pinwheel helicopter is ready to fly.
With these variations, you can create unique and exciting paper helicopters that will keep you entertained for hours.
Now that you know how to make a basic paper helicopter, it’s time to get creative and try different designs. Here are some variations of paper helicopters that you can make:
The Dual-Blade Helicopter
Instead of having four flaps, this design has two flaps that are wider and shorter than the original design. The helicopter spins as it falls, creating a unique flying pattern. To make this design, follow the steps for making a basic paper helicopter, but instead of creating four flaps, create two wide flaps.
The Propeller Helicopter
This design features a small propeller that spins as the helicopter falls. To make this design, cut out a small rectangle from the paper, making sure that the width is less than the length of the paper. Fold the paper in half, lengthwise, and cut two slits on the folded edge, about 1 cm apart. Fold up the two flaps, creating a propeller shape. Follow the steps for making a basic paper helicopter, but instead of creating four flaps, attach the propeller to the top of the helicopter with a paperclip.
The Dragonfly Helicopter
This design mimics the movement of a dragonfly in flight. To make this design, follow the steps for making a basic paper helicopter, but instead of creating four flaps, create two long, thin flaps. Cut out two small rectangles and attach them to the bottom of the flaps with tape. This will act as a weight and keep the helicopter balanced while in flight.
Making a paper helicopter is a fun and easy DIY project that anyone can do. With just a few materials and some simple steps, you can create a paper helicopter that can fly. Whether you make a basic design or try different variations, making paper helicopters is an excellent way to spend your time and boost your creativity. So, what are you waiting for? Grab some paper and get started on your paper helicopter today!

- Quality Improvement
- Talk To Minitab
Learning Design of Experiments with Paper Helicopters and Minitab
Topics: Design of Experiments - DOE , Minitab Statistical Software , Articles
This article was written by g uest blogger Matthew Barsalou , Statistical Problem Resolution Master Black Belt and Engineering Quality Expert at BorgWarner Turbo Systems Engineering GmbH with over 15 years of experience in quality.
The late statistician George E. P. Box, along with Soren Bisgaard and Conrad Fung, used a paper helicopter to teach statistics. The idea originated with Kip Rogers of Digital Equipment and is useful for demonstrating factorial designs. Decades after Box, Bisgaard and Fung’s publication, the DOE helicopter has become a useful staple of DOE training.
The paper helicopter provides a way to quickly explain basic DOE concepts. It also offers an easy-to-do experiment you can analyze using Minitab.
We can’t just declare we want a high-quality helicopter. Quality must be clearly defined.
To perform a DOE with a paper helicopter we need to identify the desired output, which would be our response variable.
A good helicopter is one which stays in the air for a longer time, so the response variable would be flight time as measured from the time the helicopter is dropped from a height of 2 meters until the time it hits the floor. Without defining the test conditions it could be possible that sample helicopters would be dropped from different heights, in which case our DOE results would be not be valid.

Test factors that influence flight time must also be identified. For the helicopter experiment, the factors could be paper type, rotor length, leg length, leg width and paper clip. The helicopter experiment levels are varied by using two different types of paper, using longer or shorter leg and rotor lengths and adding or removing a paper clip.
Here’s how to make the paper helicopters.

- Step 1: Cut the paper to a width of 5cm.
- Step 2: Cut the paper the length of paper rotor length plus leg length, and add 2 cm for the body.
- Step 3: Cut dotted lines at Leg A and Leg C. The length of each cut is 5 cm minus leg width divided by 2.
- Step 4: Fold leg A onto leg B.
- Step 5: Fold leg C onto leg B.
- Step 6: Fold rotor A and rotor B in opposite directions. They should form 90° to the body and be 180° away from each other.
- Step 7: For the paper clip version: Add a paper clip to the bottom of the leg
Table 1: Helicopter factors
Designing the Experiment
Statisticians and Six Sigma black belts should know how to set up and perform the calculations in a designed experiment by hand. However, computer programs make DOE a much simpler task, particularly for people who need to perform experiments only occasionally.
To create a fractional factorial design in Minitab Statistical Software, go to Stat > DOE > Factorial > Create Factorial Design where we can select the desired design.

Resolution is the degree to which effects are aliased with other effects. In other words, aliased effects are mixed and can’t be estimated separately. This can also be referred to as confounding, and it results from not testing every possible combination of factors.
This is a disadvantage of a fractional factorial design. However, not testing every possible combination can be a significant advantage in time and expense over a full factorial design. If you’re not sure what resolution you should use, click on Display Available Designs… to see a list of designs and resolutions.

We typically use three levels of resolution: Resolution III, IV and V. There is no confounding of main effects with each other in these three resolution types; however, in a Resolution III design, main effects will be confounded with 2-factor interactions. This is a problem because 2-factor interactions are quite common in practice. Resolution IV designs do not have 2-factor confounding with main effects, but 2-factor interactions are aliased with other 2-factor interactions, and main effects are confounded with 3-factor interactions.
We try to use Resolution IV designs instead of Resolution III designs when possible because they have less aliasing, but still require fewer experimental runs than higher resolution experiments.
Resolution V designs have the added advantage that no 2-factor effects are confounded with other 2-factor effects; however, 2-factor effects are aliased with 3-factor effects, and main effects are aliased with 4-factor effects. This is a good thing, as 3-factor and above interactions are rarely significant in practice.
The confounding problem can be eliminated by performing a full factorial design. However, this requires more experimental runs, which might be prohibitive in terms of both time and money.
Looking at the Display Available Designs… option in Minitab, we can conduct a fractional factorial experiment using either a Resolution III or a Resolution V design for the 5-factor helicopter experiment. A Resolution III design would only need 8 runs, but because of the extreme confounding, the Resolution V design that requires 16 test runs is the better option. Click on Designs… and select the desired design.
As you set up the experiment, Minitab also asks for the number of blocks. Blocks are simply homogenous groupings of measurements that can be used to account for variation. The default value is one because, ideally, everything is homogenous.
The helicopter experiment will be set up so that there is only one experimental block. Each type of paper will come from the same source. The helicopters will all be built by the same person using the same scissors and ruler. If we used paper clips from two manufacturers or had some other potential causes for variation, then we would need separate blocks. Fortunately, this is not the case.

After you select your design, click Factors to enter the names and levels of the variables in your experiment. To change the name of a factor, type the name of the factor over the letter in the name field. The factor settings can also be renamed by replacing the default values of -1 and 1 with the actual factor levels.
When you’ve completed the dialog box, Minitab creates the experimental design and displays it in a Minitab worksheet. The Session Window above the worksheet provides a description of the selected design with the resulting alias structure.

In the resulting Minitab worksheet, the experimental results are entered into column C10. We can name the column “Flight time” because that is our experimental response variable.

A randomized run order is provided in the “RunOrder” column. Without randomization there is a risk that the experimental results will reflect unknown changes in the test system over time – such as if the scissors grow dull, resulting in slightly different cuts.
Minitab’s default setting for a designed experiment is one replicate. If you observe a lot of variation in the process or the resulting measurements, you can use Stat > DOE > Modify Design to add replicates to your design. Suppose the person making the helicopters had difficulty cutting a straight line so all edges are not uniform; the differences in results may reflect this variation. Replicating runs minimizes the effects of this kind of unanticipated variation.
Gathering the Experimental Data
Variability can have a major impact on experimental results, so take steps to reduce the variability. Have the same person make all helicopters and have them use the same pair of scissors and ruler. Drop the helicopters from a height of 2 meters, and identify the drop point clearly to ensure consistency. A higher or lower starting point would affect flight time, and this could throw off the results. The helicopters must also be held and released the same way, or variation in our data might be the effect of the release method and not the design of the helicopter.
The Minitab worksheet below contains the experimental results listed under “Flight time” in column C10.

Analyzing the Data
After running the experiment and entering the collected data in the Minitab worksheet, select DOE > Factorial > Analyze Factorial Design…

Significant factors are those that influence the response as they changed from one setting to another. When you click OK, Minitab provides an ANOVA table as well as a Pareto chart of effects, which make it very easy to identify significant factors.

With all our factors included in the model, we have no degrees of freedom left for Error, and you need at least 1 degree of freedom to calculate p-values. But while we can’t accept this model based on the ANOVA results, we can use the normal plot or Pareto chart to identify factors and interactions that are not significant.

At this point, the experimenter would typically begin eliminating these factors, rerunning the analysis until only significant factors and interactions are left. This is usually referred to as “reducing the model.” As factors are removed from the model, additional degrees of freedom become available for the calculation of p-values. The number of models you need to evaluate depends on the number of factors in your analysis.
Reducing the model takes only one step with Minitab’s stepwise DOE tool. To use this feature, return to Analyze Factorial Design… (or hit Ctrl+E to open your most previous dialog box). Select C10 “Flight time” as the response, then click Stepwise…
The stepwise regression feature makes it simple and fast to select the optimal model for your data by automatically removing factors to find the model that best fits your data. You can choose from four stepwise analysis methods: Stepwise, Forward selection, and Backward elimination, and Forward Information Criteria. In Backward elimination, all factors are included in the initial analysis, and then non-significant factors are removed one by one. In Forward selection, we start with an empty model and search for significant terms. This can be a useful tool when you have a situation like we currently have: Too many terms with too few runs.

Regardless of the stepwise method you use, the model Minitab selects contains the same significant factors shown below:

To help you interpret your results, Minitab can also provide main effects and interaction plots. Select DOE > Factorial > Factorial Plots… Because we have already analyzed the results, Minitab automatically selects the factors used in our model:

Clicking OK gives us plots of the significant main effects and interactions. The main effects plot shows the results of changing from one setting to another for each factor. Be cautious with these. You can only directly interpret main effects that are *not* involved in a significant interaction. This is why we only select B and E, because the A*C interaction overrides the main effects.
The main effects plot shows we have longer flight times with the paper clip off, and longer rotor length. The interaction plot shows the interactions between the factors.
This interaction tells us about these two factors. With heavy paper, leg length DOEs not matter much. With light paper, leg length has a much larger impact. Here it shows us our longest flight is with light paper and short leg length.

Finally, we can use the Response Optimizer to find the combination of factor settings that will give us the longest flight time. Select Stat > DOE > Factorial > Response Optimizer… Our goal is to maximize the flight length.

The optimizer produces the following graph showing the optimal factor settings in red, and the predicted response for helicopters made with those settings in blue. Take note that factor D DOEs not appear, as our analysis did not flag it as significant. Because it has no statistically significant impact on flight time, we can choose the setting for Factor D based on other considerations, such as cost:

For the data we collected, our analysis with Minitab indicates the optimal helicopter settings are lighter paper, longer rotor length, shorter leg length, and no paperclip on the leg.
To design an even better helicopter, we could repeat the entire DOE using even lighter paper and longer helicopter blades. A 50 cm wing may be bigger, but that does not mean it will be better. You may be able to predict the ideal settings based on a DOE result, but you should always be cautious when extrapolating beyond the data set, or the result may be a crashing helicopter.
Suggested Searches
- Climate Change
- Expedition 64
- Mars perseverance
- SpaceX Crew-2
- International Space Station
- View All Topics A-Z
Humans in Space
Earth & climate, the solar system, the universe, aeronautics, learning resources, news & events.

2024 Total Solar Eclipse Broadcast

Eclipses Near and Far

Scientists Pursue the Total Solar Eclipse with NASA Jet Planes
- Search All NASA Missions
- A to Z List of Missions
- Upcoming Launches and Landings
- Spaceships and Rockets
- Communicating with Missions
- James Webb Space Telescope
- Hubble Space Telescope
- Why Go to Space
- Astronauts Home
- Commercial Space
- Destinations
- Living in Space
- Explore Earth Science
- Earth, Our Planet
- Earth Science in Action
- Earth Multimedia
- Earth Science Researchers
- Pluto & Dwarf Planets
- Asteroids, Comets & Meteors
- The Kuiper Belt
- The Oort Cloud
- Skywatching
- The Search for Life in the Universe
- Black Holes
- The Big Bang
- Dark Energy & Dark Matter
- Earth Science
- Planetary Science
- Astrophysics & Space Science
- The Sun & Heliophysics
- Biological & Physical Sciences
- Lunar Science
- Citizen Science
- Astromaterials
- Aeronautics Research
- Human Space Travel Research
- Science in the Air
- NASA Aircraft
- Flight Innovation
- Supersonic Flight
- Air Traffic Solutions
- Green Aviation Tech
- Drones & You
- Technology Transfer & Spinoffs
- Space Travel Technology
- Technology Living in Space
- Manufacturing and Materials
- Science Instruments
- For Kids and Students
- For Educators
- For Colleges and Universities
- For Professionals
- Science for Everyone
- Requests for Exhibits, Artifacts, or Speakers
- STEM Engagement at NASA
- NASA's Impacts
- Centers and Facilities
- Directorates
- Organizations
- People of NASA
- Internships
- Our History
- Doing Business with NASA
- Get Involved
- Aeronáutica
- Ciencias Terrestres
- Sistema Solar
- All NASA News
- Video Series on NASA+
- Newsletters
- Social Media
- Media Resources
- Upcoming Launches & Landings
- Virtual Events
- Sounds and Ringtones
- Interactives
- STEM Multimedia

Expedition 71

NASA’s LRO Finds Photo Op as It Zips Past SKorea’s Danuri Moon Orbiter

Hubble Peers at Pair of Closely Interacting Galaxies
NASA Astronaut Loral O’Hara, Expedition 70 Science Highlights

Diez maneras en que los estudiantes pueden prepararse para ser astronautas

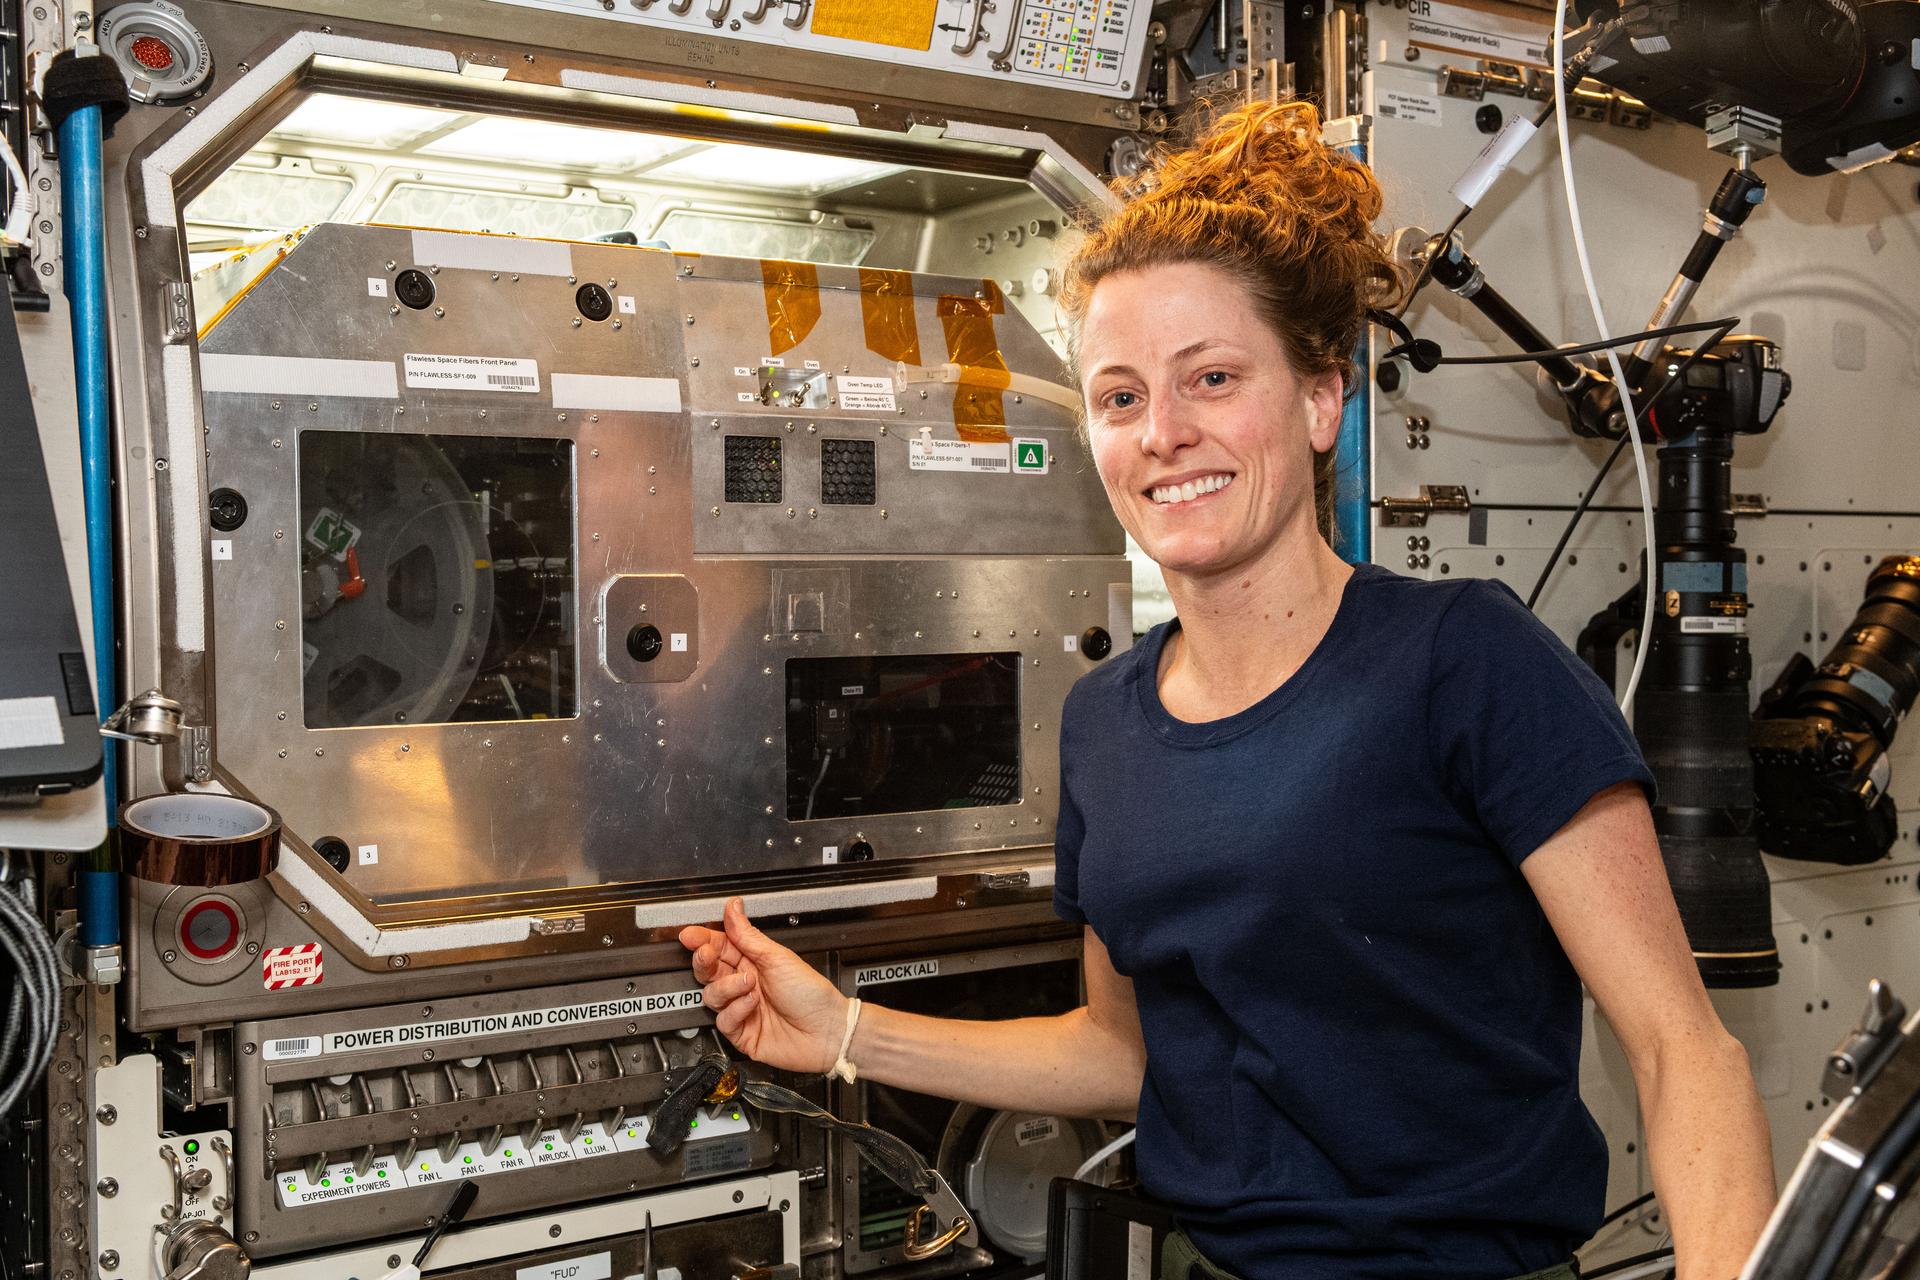
Optical Fiber Production

How NASA Spotted El Niño Changing the Saltiness of Coastal Waters

Earth Day Toolkit

Veronica T. Pinnick Put NASA’s PACE Mission through Its Paces

NASA’s NEOWISE Extends Legacy With Decade of Near-Earth Object Data

Harnessing the 2024 Eclipse for Ionospheric Discovery with HamSCI

How NASA’s Roman Telescope Will Measure Ages of Stars

NASA’s Webb Probes an Extreme Starburst Galaxy

Amendment 8 A.44 Earth Action: Health and Air Quality Applied Sciences Team Final Text and Due Dates.

Introduction to Spectrum

NASA Langley Team to Study Weather During Eclipse Using Uncrewed Vehicles

NASA Noise Prediction Tool Supports Users in Air Taxi Industry

ARMD Solicitations

Tech Today: Synthetic DNA Diagnoses COVID, Cancer

David Woerner

Tech Today: Cutting the Knee Surgery Cord

NASA Partnerships Bring 2024 Total Solar Eclipse to Everyone

NASA, Salisbury U. Enact Agreement for Workforce Development

NASA Wallops to Launch Three Sounding Rockets During Solar Eclipse

Astronauta de la NASA Marcos Berríos

Resultados científicos revolucionarios en la estación espacial de 2023
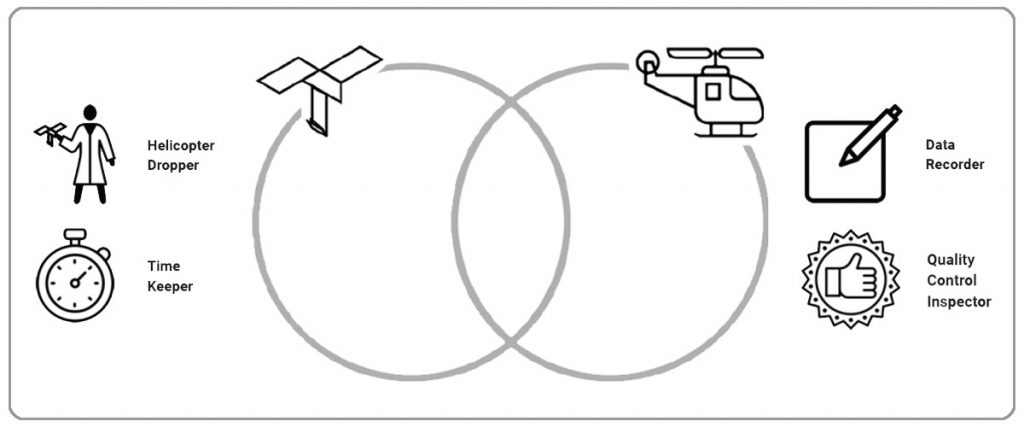
Out for a spin — paper helicopters.

Grade Levels
Grades K-4, Grades 5-8
Physical Science, Flight and Aeronautics
Play and Learn
By building and test flying two different paper helicopters, you will learn how the size of the Mars helicopter, Ingenuity’s, rotor blades are important for it to be able to fly in the thin atmosphere of Mars.
Out for a Spin
Learning Space
Teachable Moments
Stay Connected

Classroom Activity
Make a paper mars helicopter.

- This lesson is also available as an independent activity for students .
- See tips for remote instruction in the Management section.
NASA's Perseverance Mars rover launched in July 2020, carrying the first helicopter to the surface of Mars ! This helicopter has to be lightweight and have large blades to fly on Mars. These large blades rotate so quickly that they generate enough lift to overcome the gravity of the Red Planet and lift off the ground.
In this project, students will build a paper helicopter. Then, just as NASA engineers had to try out different versions of the Mars helicopter before coming up with a final design, students will experiment with the design of their helicopters to see what works best.
Plain paper OR a copy of the template – Download PDF
Measuring tape
(Optional) 3-meter (10-foot) length of lightweight ribbon or smartphone camera
Have extra copies of the template or blank paper ready so students can make multiple helicopters.
Tips for Remote Instruction
- If you are teaching online and students do not have access to a printer, have them trace the template by holding up a piece of paper to their computer screen. Remind them to not press hard and damage their screen.
- If students are learning from home and they don’t have a measuring tape or ruler, have them select something to use as a nonstandard measurement tool. Pencils work well.
- If students are learning from home and do not have access to a piece of ribbon, have them tape thin strips of paper together to create a ribbon.
In July 2020, NASA launched the Perseverance rover to Mars. Traveling along with Perseverance is Ingenuity, the first helicopter designed to fly on Mars . A small autonomous aircraft, Ingenuity is designed to perform the first tests of powered flight on another world. In the months after Perseverance lands, the helicopter will be lowered from the rover's belly onto the surface of Mars to test powered flight in the planet's thin atmosphere.
Ingenuity will perform a series of test flights over a 30-Martian-day window that will begin sometime in the spring of 2021. (A Martian day, or sol, is 24 hours and 37 minutes.) For its first flight, Ingenuity will hover a few feet above the ground for about 20 to 30 seconds and land. That alone will be a major achievement: the very first powered flight in the extremely thin atmosphere of Mars! After that, the team will attempt additional experimental flights over a farther distance and at a greater altitude. Ingenuity’s performance during these experimental flights will help inform decisions about the future use of small helicopters for Mars exploration. Future Mars helicopters could serve as robotic scouts, surveying terrain from above, or they could function as stand-alone science craft carrying instrument payloads.
Learn how JPL engineers built a helicopter that could make the first powered flight on Mars. | Watch on YouTube
Designing a helicopter to fly on Mars was no small task. The Mars atmosphere is only 1% the density of Earth’s atmosphere, so generating enough lift to overcome the gravity of Mars is a challenge. The helicopter had to be lightweight with extremely fast rotors to be able to generate enough lift. Though a full outdoor test couldn't be done on Earth, engineers were able to simulate conditions on Mars inside a test chamber at NASA's Jet Propulsion Laboratory in Southern California. To do this, they offset Earth's gravity by attaching tethers to the helicopter that support about 62% of its weight. Then, they performed flight tests inside a vacuum chamber that pumped out approximately 99% of the air, leaving a very thin atmosphere. Months of design, testing, redesign, and retesting went into the development of the Ingenuity Mars helicopter. Though engineers came up with their best design and it worked well inside the test chamber, the real test is yet to come once the Perseverance rover lands on the surface of Mars, delivering Ingenuity to its new test environment.
In this activity, your students will experiment with simple paper helicopter designs, engaging in the engineering design process that NASA engineers use every day.
- Ask students to describe how a helicopter flies. Elements of their description should include fast-moving, horizontal, rotary blades.
- Explain that the rotary blades are slightly angled so they can push against the air and lift the helicopter off the ground.
- Ask students what else rotates and pushes against air (e.g., a fan). Ask students to compare and contrast a fan with a helicopter. For example, both move air in similar manners, but the helicopter moves a large volume of air downward while a fan usually moves a smaller volume of air toward us.
- Explain that a helicopter moves so much air with its large, fast-moving blades, that the force of the blades against the air can overcome the weight of the helicopter and push it up off the ground. The helicopter is working against the force of gravity – which is constantly pulling the helicopter down toward the ground – and generating an upward force called “lift” by rotating its blades through the air. When the force of lift is greater than the force of gravity, the helicopter rises from the ground and flies.
- Ask students if a helicopter might fly differently on the Moon or Mars and why. Note: The Moon doesn’t have an atmosphere in which to generate enough lift to fly. Mars has a very thin atmosphere that may be able to support a small helicopter with very fast-moving blades. NASA’s Mars Ingenuity helicopter will test whether this is feasible.
NASA's Mars Helicopter, Ingenuity, arrives at Mars on Feb. 18, 2021. Its mission: to demonstrate the first powered flight on another planet. Taking to the Martian skies in Spring 2021. Credit: NASA/JPL-Caltech | › Video details
Footage of tests of the Ingenuity Mars helicopter at NASA's Jet Propulsion Laboratory in Southern California. Credit: NASA/JPL-Caltech | Watch on YouTube
- To have students build their helicopters as an independent project, have them follow the instructions (including a video tutorial with subtitles en Español) here . Teacher-directed instructions continued below.

Cut out the helicopter. Image credit: NASA/JPL-Caltech | + Expand image

Fold along the solid lines. Image credit: NASA/JPL-Caltech | + Expand image
Test flight. Image credit: NASA/JPL-Caltech | + Expand image
Comparing resistance. Image credit: NASA/JPL-Caltech | + Expand image
Counting rotations. Image credit: NASA/JPL-Caltech | + Expand image
- Have students cut along the dashed lines of the helicopter template.
- Have students fold the propeller blades, A and B, in opposite directions along the solid lines. The X and Y panels fold toward the center, and Z is folded upward to give the body of the helicopter rigidity and lower its center of gravity for more stable flight.
- Have students do a test flight by standing up, holding the helicopter by its body, raising it as high in the air as they can and dropping it. Ask them: What do you observe? Which way do the blades turn? Drop the helicopter from a higher spot. (Climb a few stairs or stand on a step stool.) How does the performance change?
- Ask students what they might change about their helicopter to affect its performance. Encourage them to make one change to their helicopter and do another drop. If students have a hard time thinking of changes, suggest they try making one more fold on the bottom of their helicopter, or try shortening or changing the shape of the blades. How does the performance change? Why does the chosen change have this effect? Have students share their changes and results.
- Ask students if they can figure out how to make their blades turn faster or slower. Ask them to figure out how to make their blades turn in the opposite direction.
- Ask students to think about how they might improve the performance of their helicopter and make another one that is different from their first. Have them use a different kind of paper or make a much smaller or much larger one. How big of a helicopter can you make that will still work? How small of a helicopter can you make? How do helicopters with different blade sizes compare in performance? What size works best? How do you define "best performance"?
- Ask students what happens to the helicopter when they drop it from higher locations. Most students should say that the blades rotate more.
- Ask students to drop one of their helicopters and try to count how many times the blades rotate. It’s impossible! Ask how they might solve the problem of counting rotations. Older students may have smartphones and be able to record a slow-motion video. Younger students may be stumped by the challenge.
- Have students with access to a slow-motion video proceed in that direction. Have other students attach a straight ribbon to the bottom of their helicopter, stand on the end of the ribbon to hold it securely in place on the floor and drop their helicopter as before. Once the helicopter comes to rest on the ground, have them count the twists in the ribbon to determine how many rotations their helicopter made.
- Have students design an experiment that will allow them to predict the number of spins their helicopter will accomplish from an unknown height. Ask students to measure several heights to drop from, using a measuring tape or nonstandard unit of measurement. Have them start dropping from the lowest point possible – usually about two feet from the ground – and recording the number of turns. Have them make a t-chart to record the distance they dropped from and the number of turns.
- Have students repeat measurements for a variety of heights that they can easily reach.
- Have students graph their results on an x-y plane.
- Have students add the height of a step stool or stairs to the height they can reach and use their graph to estimate the number of turns their helicopter will achieve on a drop from that height. Have older students develop a rule for computing the number of turns from a given height.
- After they’ve recorded their estimate, have students get on the step stool or stairs and drop their helicopter. They will need a peer or family member to hold the bottom of the ribbon steady on the floor.
- As time permits, have students experiment with different helicopter designs and count and graph rotations. What designs rotate slowest and which rotate fastest?
- Which helicopters reach the ground sooner: those that rotate faster or slower?
- How does the speed of rotation affect the flight of a real helicopter? How might this be important when designing a helicopter for Mars?
- How was your experience designing and testing a paper helicopter similar to how NASA engineers designed and tested the Ingenuity Mars helicopter?
- Students should be able to experiment with the design of their helicopter to change performance.
- Students should be able to demonstrate the ability to predict rotations based on experimental data.
Code a Mars Helicopter Video Game
Create a video game that lets players explore the Red Planet with a helicopter like the one going to Mars with NASA's Perseverance rover!
Type Project
Subject Technology
Explore More
- Website: NASA Ingenuity Mars Helicopter
- Website: NASA Perseverance Mars Rover
- Video: Testing the Mars Helicopter Delivery System
- Video Series: Mars in a Minute
Check out these related resources for kids from NASA Space Place :
- All About Mars
- Explore Mars: A Mars Rover Game
- Space Place Coloring Pages
Engineering Learn
28 Parts of Helicopter and Their Functions [Complete Guide]
![28 Parts of Helicopter and Their Functions [Complete Guide]](https://engineeringlearn.com/wp-content/uploads/2023/06/Parts-of-Helicopter-1024x539.jpg "parts of a paper helicopter")
Introduction
28 Parts of Helicopter and Their Functions [Complete Guide]: – Helicopters can be utilized for many things. They can be utilized as flying ambulances to convey patients. They can be loaded or stacked with water to fight large fires. Helicopters are utilized to get supplies to ships . Helicopters can be utilized to transport large objects from one spot to another. Helicopters can safeguard people in hard-to-reach places like mountains or in difficult situations. There are numerous things that should be possible with helicopters.
What are Helicopters?
A helicopter is a noteworthy airplane that uses horizontally spinning rotors to generate lift and thrust. The unique design of a helicopter empowers it to perform impressive accomplishments like vertical takeoffs and landings, hovering in mid-air, and flying toward any direction forwards, in reverse, and horizontally. It is a remarkable engineering marvel that showcases how we might understand aerodynamics. Its ability to ascend in the sky and drift weightlessly is really entrancing, showing our mastery over gravity.
The perplexing design of each and every part of a helicopter is a testament to its extraordinary capabilities. Regardless of its complexity, the anatomy of a helicopter reflects human creativity and addresses a significant achievement in present-day engineering. The helicopter’s versatility and agility make it a symbol of human innovation and a source of inspiration for people in the future.
Parts of Helicopter
- Transmission
- Stabilizers
- Hydraulic System
- Cooling System
- Rotor Brake
- Communication Systems
- Navigation Systems
- Instrumentation
- Electrical System
- Landing Gear
- Fuel System
- Exhaust System
- Fire Suppression Systems
- Lighting Systems
- Flight Controls
- Emergency Systems
1. Main Rotor : ( Parts of Helicopter )
The main rotor of a helicopter comprised various blades attached or joined to a central hub that rotates or turns to generate lift. What separates the blade apart is their remarkable “twist,” with the angle of every blade varying along its length to optimize its lift and drag properties. Notwithstanding this design includes, modern helicopters face a limiting factor known as “retreating blade stall” while flying at high speeds.
This phenomenon happens when the lift produced by the blade on the side of the rotor inverse the direction of flight diminishes. It brings about an overall decline in the lift for the helicopter. This factor confines a helicopter’s maximum forward speed, highlighting the significance of rotor design in airplane engineering.
2. Swashplate : ( Parts of Helicopter )
The purpose of the swashplate is to direct the rotor blades to create the ideal lift, permitting the helicopter to perform many maneuvers. The swashplate system is unbelievably complex, including a stationary ring and a rotating swashplate. It transmits the pilot’s input to the rotor blades, controlling the Helicopter’s flight. Every part plays its unique role to build a wonderful and striking exhibition in the sky.
3. Engine : ( Parts of Helicopter )
Helicopter engines are wonders of engineering, providing the power vital to rotate or pivot the rotor systems while being compact and lightweight. Captivating that helicopter engines are designed to operate at a consistently high speed, with the rotor blade’s pitch angle being varied or fluctuated to control lift as well as direction. It is in contrast to a fixed-wing aircraft, where the engine’s output is utilized to drive the aircraft’s forward motion.
4. Transmission : ( Parts of Helicopter )
The transmission system in a helicopter plays an essential part in transferring power from the engine to the rotor systems. Nonetheless, its design can contrast altogether across different helicopter models, with some utilizing gears, while others might utilize belts or chains. Moreover, a few modern helicopters utilize a high-level transmission system called the “integrated transmission” system. This innovative design integrates the engine, gearbox , and rotor systems into a solitary, compact unit, bringing about enhanced efficiency and reduced weight.
5. Tail Rotor : ( Parts of Helicopter )
The tail rotor might appear to be a relatively simple part, yet its engineering is everything except. For instance, a few helicopters utilize a “Fenestron” tail rotor, which is basically a ducted fan that sits in the tail section of the helicopter. This design offers a few benefits, including increased safety, decreased noise, and magnificent mobility. Also, a few helicopters have tried different things with “tail-sitter” designs, which permit the helicopter to take off and land in a vertical direction while resting on its tail.
6. Stabilizers : ( Parts of Helicopter )
Each helicopter has a stabilizer. his weight bar is mounted across the rotor. A damaged stabilizer is normal, however it need expert repair quickly. The stabilizer on a helicopter diminishes noise from the rotor and eliminates vibration from the rotor. It balances out the helicopter in every single flying circumstance, including hovering. Without a stabilizer, helicopters are difficult to control.
The vibration from the rotor without a stabilizer can make for an exceptionally harsh ride. Stabilizers essentially increase the controllability and steadiness of a helicopter. While a helicopter can run without a functioning stabilizer, it is ideal to have regular maintenance to ensure that the pilot doesn’t need to utilize the copter without a stabilizing system.
7. Hydraulic System : ( Parts of Helicopter )
This system utilizes hydraulic fluid to transmit power from the main engine to the rotor system, considering precise control of the helicopter’s movements. In any case, did you have any idea that the hydraulic systems in certain helicopters are capable of generating pressures of as much as 5,000 pounds per square inch? That is sufficient pressure to take a vehicle off the ground.
8. Cooling System : ( Parts of Helicopter )
Did you have any idea that helicopters need to operate in probably the harshest circumstances possible, from scorching deserts to freezing mountains? That is the reason the cooling system in a helicopter isn’t a simple radiator and fan. All things being equal, it frequently incorporates complex heat exchangers and other advanced innovations to ensure that the engine and different parts stay cool even in the most outrageous conditions.
9. Rotor Brake : ( Parts of Helicopter )
Rotor Brake is an essential and fundamental part and isn’t just like a basic brake pad or caliper. All things considered, it utilizes complex mechanisms to slow down or stop the rotation or revolution of the rotor system, frequently in no time or seconds . In some helicopters, the rotor brake can be activated automatically by sophisticated control systems, helping to prevent accidents and injuries during critical operations.
10. Airframe : ( Parts of Helicopter )
The structural designs of the helicopter are essentially designed and intended to give the helicopter its exceptional flight attributes. Airframe is one of essential and fundamental part of that structure. The mechanical structural design of a helicopter is known as the airframe.This structure is ordinarily considered to include or incorporate the fuselage, undercarriage, empennage and wings, and excludes the propulsion system. These air-frames are made of strong materials known to man, including titanium, Kevlar, and unobtanium.
11. Fuselage : ( Parts of Helicopter )
The fuselage is the helicopter’s body, and it plays a critical part in the helicopter’s stability, safety, and execution. As of late, helicopter manufacturers have been exploring new materials and designs to create lighter, more sturdy, and more efficient fuselages. One exceptional approach includes utilizing biodegradable materials like mushroom-based composites to create the fuselage. These materials are eco-friendly and feasible, making them a viable option for the future of helicopter design.
12. Cockpit : ( Parts of Helicopter )
The cockpit is the control center of the helicopter, and it is where the pilot oversees and navigates the helicopter. In modern helicopters, the cockpit is equipped or furnished with state-of-art aeronautics and control systems that permit pilots to fly easily and with precision. Yet, have you at any point considered what controlling a helicopter without a traditional cockpit could be like? A few modern designs propose utilizing virtual reality headsets to create a 360-degree perspective of the helicopter’s environmental factors, permitting pilots to see beyond the limits of traditional cockpit windows.
13. Communication Systems : ( Parts of Helicopter )
Communication is the way to success in any field, and helicopters are no exemption. With plenty of communication systems available to them, helicopters are generally in contact with air traffic control, other airplane , and ground crews. The communication systems in helicopters are so advanced that they could even communicate with extraterrestrial creatures, should the need emerge.
14. Navigation Systems : ( Parts of Helicopter )
Navigation through the air can be a challenging one, yet helicopters have advanced navigation systems that have it completely under control. These systems are precise to such an extent that they can navigate through the densest fog or mist or the thickest storm clouds easily. Helicopter navigation systems are so precise or exact to the point that they could in fact direct you to the most remote regions of the world, regardless of whether you have a map.
15. Instrumentation : ( Parts of Helicopter )
Instrumentation in a helicopter includes or incorporates a variety of sensors, indicators, and showcases that give pilots vital information on the position of airplane, speed, elevation, performance of engine, and other critical systems. The instrumentation suite comprises of numerous instruments, for example, the altimeter, velocity marker, vertical speed indicator, engine instruments, and route or navigation instruments.
16. Electrical System : ( Parts of Helicopter )
The electrical system is the operational hub of the helicopter, which is responsible for powering and controlling the different electrical parts onboard accessible on the helicopter. The battery resembles the brain, providing the initial spark to start the engine, while the generator resembles the spinal cord, producing electricity to power the helicopter’s systems. The electrical wiring sends signals all through the helicopter, permitting the pilot to control and monitor the helicopter’s systems with precision.
17. Avionics : ( Parts of Helicopter )
Avionics to the electronic systems and equipment utilized in the helicopter, includes communication, navigation, and monitoring systems. These systems are essential for ensuring the safety and efficiency of the helicopter, and manufacturers are continually exploring new innovations to further improve avionics execution. One novel way to deal with avionics is to utilize artificial intelligence and AI algorithms to create intelligent helicopter systems. These systems can analyze data from sensors and cameras to distinguish potential safety hazards and provide real-time feedback to pilots, enhancing safety and decreasing pilot workload.
18. Seats : ( Parts of Helicopter )
The design of Manufacturer’s helicopter seats ensure travelers’ safety, security as well as comfort, Its because seats plays an essential part in such manner. In flight, travelers experience harsh conditions and extreme maneuvers, making it important to design helicopter seats that can endure these conditions. The seats should offer maximum support to both passengers and pilots. Safety and harnesses to keep travelers from being jolted out of their seats during any kind of turbulence or abrupt developments, seats play a very vital role.
19. Doors : ( Parts of Helicopter )
Doors (Entryways) in helicopters serve a few critical functions, which includes providing admittance to the cabin, ensuring the security of passengers, and adding to the airplane’s streamlined features. Helicopter doors(entryways) are generally made using lightweight materials like aluminum or composite materials. They may be fitted with locks, hinges, and emergency release systems to prevent accidental openings during flight. Helicopter doors should be carefully designed to try not to create turbulence, which can destabilize the helicopter.
20. Windows : ( Parts of Helicopter )
Manufacturers design helicopter windows to withstand extreme conditions, such as high-speed winds, sudden temperature changes, and vibrations, using durable materials such as polycarbonate, acrylic, or glass. They may also treat them with coatings to enhance their resistance to abrasions, impacts, and ultraviolet (UV) radiation. To prevent or forestall leaks and ensure air tightness at high altitudes, specialists typically fit helicopter windows with unique seals.
21. Landing Gear : ( Parts of Helicopter )
The Landing gear permits the helicopter to take off and land safely. Customarily, the landing gear has been designed as skids or wheels attached or connected to the underside of the fuselage. One-of-a-kind approach is to land and take off a helicopter in an upward direction, without the requirement for wheels or skids. These purported “hover-bikes” use ducted fans to produce lift and propulsion, permitting them to hover and move such that traditional helicopters can’t.
22. Fuel Tanks : ( Parts of Helicopter )
Helicopters require fuel tanks to store the fuel essential for powering the engine, making them an essential part. Engineers regularly construct these tanks from lightweight materials like aluminum or composites, to limit weight and increment fuel efficiency. Engineers should cautiously consider the placement of the fuel tanks to ensure the helicopter maintains its equilibrium as well as safety during flight, even as the fuel level changes. Moreover, designers should create fuel tanks equipped for enduring the extreme conditions experienced during flight, like high altitudes and turbulence.
23. Fuel System : ( Parts of Helicopter )
The fuel system resembles the bloodline of the helicopter, delivering or conveying life-giving fuel to the engine. These fuel tanks resemble a ravenous stomach, capable of holding a few hundred gallons of fuel. The fuel lines are like veins, carrying the precious fuel from the tank to the engine. The fuel pump resembles the heart, pumping the fuel to the engine at the right flow rate and pressure, keeping the engine running along as smoothly as well as effectively.
24. Exhaust System : ( Parts of Helicopter )
The exhaust system is responsible and liable for routing the hot gases produced during combustion away from the helicopter and forestalling the development of harmful exhaust fumes. Without the exhaust systems, a helicopter’s engine would rapidly overheat, which leads to a devastating failure. Furthermore, the exhaust system likewise plays a crucial part in diminishing the noise of the engine, ensuring that the helicopter doesn’t disturb the tranquility of those on the ground.
25. Fire Suppression Systems : ( Parts of Helicopter )
Helicopters are designed to endure outrageous circumstances, including fire. The fire suppression systems in helicopters are strong to such an extent that they can extinguish a raging fiery blaze with simply a solitary blast.
26. Lighting Systems : ( Parts of Helicopter )
Lighting systems are important for helicopters that operate during evening or low-light conditions. Navigation lights, landing lights, and anti-collision lights are critical parts of a helicopter’s lighting system. Pilots use navigation lights to indicate and demonstrate the position and direction of any movement of their helicopter to other airplanes. They depend on landing lights to provide extra illumination during helicopter take-off and landing, and they activate anti-collision lights to increment visibility and lessen the risk of any kind of crash.
27. Flight Controls : ( Parts of Helicopter )
Flight controls are the critical mechanism that permits a pilot to control a helicopter’s movements in the air. It includes and incorporates the collective, cyclic, and tail rotor pedals. Collective control is utilized to adjust the pitch of the rotor blades in an collective way, permitting the helicopter to acquire or lose altitude. The cyclic control adjusts the angle of the rotor blades exclusively, permitting the helicopter to move forward, in reverse, or sideways. The tail rotor pedals control the direction of the tail rotor, which is utilized to counteract the torque produced by the main rotor.
28. Emergency Systems : ( Parts of Helicopter )
Emergency systems are critical parts of any helicopter, providing a method of escape or safeguarding in case of any emergency. It includes emergency floats, emergency exits, and emergency locator transmitters (ELTs). Emergency floats keep the helicopter above water in case of a water landing, while emergency exits provide a means of escape for travelers and crew. ELTs transmit a distress signal to look and rescue teams in case of an emergency, allowing for fast and effective reaction.
Helicopters are utilized for the vast majority and various reasons where they might be the most versatile vehicle in the world. A helicopter can do everything: float, land on uneven ground, travel upward, on a level plane, and each and every in the middle between. From leg-like skids or pallet to electric tail rotors, it will be intriguing or entrancing to see how much further the helicopter develops. Modern helicopters are safer, more efficient, and more useful than ever before. They operate in harsh and remote conditions, fly into difficult situations, and perform missions that no other sort of airplane might at any point achieve.
Helicopters affect our lives in many ways. A portion of the helicopters used for commercial purposes are really decommissioned military helicopters. Without a doubt, even businesses that gently use helicopters commercially ought to have a helicopter spare parts supplier close by.
Image Source: – helimart
You may also like...

8 Types of Police Cars – Pros & Cons of Purchasing a Pre-Owned Police Car [with Pictures & Names]
July 9, 2022

15 Types of Pickup Trucks and Their Pros & Cons [with Pictures & Names]
July 13, 2022

Rescue Trucks: Definition, Types, Uses, Specifications, Equipment & Requirements
March 7, 2023

Blow Molding: Definition, Types, Process, Advantages & Disadvantages [Complete Details]

Ladder Truck | What are Ladder Trucks? | Aerial Ladder Trucks | Benefits of Ladder Trucks | Limitations of Ladder Trucks

Party Bus: 10 Best Party Buses in World [With Pictures & Names]

20 Types of Car Brands and Their Logo – [With Pictures & Names]

17 Advantages of Steel and Their Uses in Construction – [Explained]

30 Parts of Boat and Their Functions [With Pictures & Names]

27 Parts of Tank and Their Uses [With Diagram, Pictures & Names]

17 Parts of AC (Air Conditioner) – With [Functions, Diagram Names & Pictures]

18 Parts of Boat Trailer and Their Diagram [With Pictures & Names]

14 Parts of a Lamp and Their Uses [Explained with Diagram]

15 Parts of Door Knob/Lock and Their Functions [With Pictures & Names]
slidingmotion
Complete Guide to Parts of Helicopter: Names, Functions & Diagram

Table of Contents
Overview of Helicopter Parts
A helicopter is a remarkable aircraft that utilizes horizontally spinning rotors to generate lift and thrust. The unique design of a helicopter enables it to perform impressive feats such as vertical takeoffs and landings, hovering in mid-air, and flying in any direction – forwards, backward, and laterally. It is a remarkable engineering marvel that showcases our understanding of aerodynamics. Its ability to ascend into the sky and hover weightlessly is truly mesmerizing, demonstrating our mastery over gravity. The intricate design of every parts of a helicopter is a testament to its outstanding capabilities. Despite its complexity, the anatomy of a helicopter reflects human ingenuity and represents a significant accomplishment in modern engineering. It opens up a world of transportation, rescue operations, and exploration possibilities. The helicopter’s versatility and agility make it a symbol of human innovation and a source of inspiration for future generations.
Parts of a Helicopter Diagram

Helicopter Parts Names
Transmission, landing gear, fuel system, electrical system, stabilizers, hydraulic system, cooling system, rotor brake, emergency systems, communication systems, fire suppression systems, navigation systems, instrumentation, exhaust system, flight controls, lighting systems, parts of a helicopter: names & functions.
The main rotor of a helicopter is a feat of engineering. It comprises several blades fastened to a hub in the center and revolves to provide lift. The blades are distinguished by their particular “twist.” Each blade has a different angle along its length to maximize its lift and drag characteristics.
Modern helicopters, however, encounter a limitation known as “retreating blade stall” when they fly at high speeds.
This phenomenon occurs when the lift generated by the blade on the side of the rotor facing the opposite direction of flight diminishes.
The helicopter’s total lift is reduced as a result. This constraint limits the maximum forward speed of a helicopter, demonstrating the significance of rotor design in aviation engineering.
The tail rotor is a crucial part of a helicopter. Some of the helicopters use an innovative design called the “Fenestron” tail rotor. Unlike traditional exposed rotor blades, the Fenestron is a ducted fan placed in the helicopter’s tail.
This design comes with several benefits. It improves maneuverability, enhances safety, and reduces noise. Additionally, some helicopters explore the idea of a “tail-sitter” to enable the aircraft to take off and land vertically while upright on its tail.
Helicopter engines are lightweight and small while supplying the rotational force required for the rotor systems.
Interestingly, the pilots adjust the pitch angle of the rotor blades to regulate lift and direction while maintaining the helicopter engines at a constant high speed. In contrast, a fixed-wing aircraft uses the power of its engine to propel the craft forward.

Read More- Ultimate Guide on 22 Car Engine Parts: Names, Functions & Diagram
In a helicopter, the gearbox system is essential for moving power from the engine to the rotor systems. However, its design varies as per the helicopter type. Some use gears, and others use belts or chains.
Several modern helicopters use cutting-edge gearbox technology called the “integrated gearbox” system. This ground-breaking design combines the engine, transmission, and rotor systems into one compact unit, which increases efficiency and lowers weight.

Read More- Guide to Automatic Transmission Parts: Names, Functions & Diagram
The helicopter’s cockpit acts as the pilot’s workspace and the control hub for the craft. Modern helicopters include cutting-edge avionics and control technologies in the cockpit, enabling pilots to fly safely and accurately.
The helicopter’s body, or fuselage, is essential to the craft’s performance, stability, and safety. Creating lighter, more resilient, and more effective fuselages has recently been a focus for helicopter producers.
One original method is making the fuselage is by using biodegradable materials, such as bioplastics or composites based on mushrooms. These substances provide a potential alternative for helicopter design in the future since they are sustainable and good for the environment.
The helicopter can safely take off and land due to the landing gear. The landing gear is as wheels or skids fastened to the underside of the fuselage.
The term “avionics” refers to the electronic devices and machinery utilized by the helicopter, such as the navigation, communication, and monitoring systems.
The functioning of these systems is crucial for guaranteeing the safety and effectiveness of the helicopter. Thus, manufacturers are continually looking into new technologies.
Artificial intelligence and machine learning algorithms can be utilized to create intelligent helicopter systems.
These systems can use data from sensors and cameras to analyze and detect possible safety issues by giving pilots immediate feedback, improving safety, and lightening their burden.
It supplies the engine with gasoline from the gasoline tanks that have a capacity of several hundred gallons.
The fuel lines transport the valuable gasoline from the tank to the engine. The fuel pump pumps fuel to the engine at the proper flow rate and pressure, ensuring smooth and effective operation of the engine.
It provides the initial spark to turn on the engine, and the battery functions as the brain. On the other hand, the generator generates energy to operate its systems.
The electrical wiring transmits messages throughout it. It enables the pilot to operate precisely and monitor the helicopter’s systems.
The stabilizers are in charge of preserving stability while in flight. The horizontal stabilizer prevents up-and-down pitching.
The vertical stabilizer prevents the helicopter from yawing or rolling. Together, they keep the helicopter steady and secure while in flight.
The swashplate guides the rotor blades to provide the appropriate lift and enable a variety of maneuvers for the helicopter.
The swashplate system consists of a revolving swashplate and a fixed ring. It transfers the pilot’s commands to the rotor blades, which control the aircraft’s flight.
This system transfers power from the main engine to the rotor system via hydraulic fluid for precise control of the helicopter’s motions.
Did you know that helicopters have to work in the most difficult environments, from sweltering deserts to icy mountains?
Because of this, a helicopter’s cooling system is more complex than just a straightforward radiator and fan. Instead, it frequently uses intricate heat exchangers and other technology to keep the engine and other components cool even in harsh environments.

Read More- 5 Essential Air Conditioner Parts: Names, Functions, and Diagrams
Some helicopters have advanced control systems that automatically turn the rotor brake on. This function helps protect people during crucial procedures by preventing accidents and injuries.
Helicopters offer the highest levels of safety and security in an emergency; they include technologies like satellite communications and sophisticated sensors.
Helicopters equipped with the most current emergency systems are capable of completely automated emergency landings.
Helicopters are constantly in contact with air traffic control, other aircraft, and ground employees because of their many communication devices.
Helicopters are made to survive harsh environments, including fire. Helicopter fire suppression systems are so effective that they can create a roaring blaze with only one blast.
Helicopters have good navigational systems that make it seem simple. These devices are so precise that they can easily go through even the thickest fog or storm clouds.
Even if you don’t have a map, helicopter navigation systems are so accurate that they can lead you to even the most distant regions of the globe!
The backbone of a helicopter is its airframe, built to resist harsh circumstances.
The strongest materials used to construct these airframes include titanium, kevlar, and unobtanium. The airframe is so robust that a meteorite may strike it directly without damaging it!
The instrument panel of a helicopter has sensors, indicators, and displays that give pilots crucial knowledge about the position, speed, altitude, engine performance, and other vital systems.
The instrumentation suite comprises numerous instruments, such as the altimeter, airspeed indicator, vertical speed indicator, engine, and navigation.
As seats are so important, manufacturers ensure the seats are safe and comfortable for the passengers. It is vital to build helicopter seats that can survive the severe environments and tremendous maneuvers that passengers experience.
The chairs must offer maximum support, stability, and safety harnesses. When there is turbulence or unexpected movements, they should stop passengers from being thrown out of their seats.
Helicopter seats are frequently built using materials like carbon fibre, titanium, or Kevlar. The chairs are impact-resistant, lightweight, and made of these materials.
Manufacturers create helicopter windows using tough materials like polycarbonate, acrylic, or glass to survive harsh weather conditions, including high-speed winds, abrupt temperature changes, and vibrations.
They may also apply coatings to increase their resistance to abrasions, impacts, and ultraviolet (UV) radiation.
Experts frequently install special seals on helicopter windows to stop leaks and guarantee airtightness at high altitudes.
Access to the cabin, assuring passenger safety, and improving aerodynamics are crucial roles doors play in helicopters.
Helicopter doors are typically made of composite materials or lightweight aluminum. Manufacturers equip them with locks, hinges, and emergency release systems to prevent unintentional opening during flight.
Properly constructing helicopter doors is essential to prevent turbulence, as it can destabilize the helicopter. The air intake is an inlet outside the helicopter that lets air into the engine for combustion.
People often forget the helicopter’s exhaust system, even though it is essential in ensuring a safe and effective flight.
The aircraft’s exhaust system directs the hot gases created by combustion away from the craft and avoids the accumulation of hazardous exhaust gases. A helicopter’s engine would soon overheat without the exhaust system, which might result in a catastrophic failure.
The exhaust system is essential in decreasing engine noise to prevent the helicopter from disturbing individuals on the ground.

Read More- 8 Essential Parts of Exhaust System: Names, Functions & Diagram
Gasoline tanks are critical for helicopters because they hold the gasoline needed to operate the engine. Engineers often build these tanks with lightweight materials like aluminum or composites to reduce weight and improve fuel economy.
Engineers must carefully determine where to install the fuel tanks to preserve the helicopter’s balance and stability during flight. It is essential, especially given the fluctuating fuel level.
Additionally, fuel tanks must be designed to endure the harsh circumstances encountered during flight. High heights and turbulence are some of these circumstances.
The vital systems that provide a pilot control over a helicopter’s motions in the air are called flight controls. The collective, cyclic, and tail rotor pedals are part of it.
The rotor blades’ collective pitch may be changed via collective control, which enables the helicopter to gain or lose height. The helicopter may travel forward, backward, or sideways by separately adjusting the angle of each rotor blade.
The pilot controls the direction of the tail rotor, which is used to offset the torque generated by the main rotor using the tail rotor pedals.
Lighting systems are necessary for helicopters to fly at night or in poor light. The lighting system of a helicopter must include lights for navigation, landing, and anti-collision.
Pilots employ navigation lights to communicate where and how their helicopter moves to other aircraft. They turn on anti-collision lights to improve visibility and lessen the chance of collision. They rely on landing lights to give extra illumination during takeoff and landing.

Read More- Comprehensive Guide on 12 Types of Light Bulbs: Mastering Light
Any helicopter’s emergency systems are essential because they provide a way to flee or rescue. It comprises location transmitters (ELTs), emergency flotation devices, and exits.
In the case of a water landing, emergency floats keep the helicopter afloat, while emergency exits give passengers and crew a way out. In an emergency, ELTs send a distress signal to search and rescue teams, enabling an immediate and effective response.
Related Posts-
- Ultimate Guide on 19 Parts of a Drone: Names, Functions & Diagram
- Complete Guide on 30 Key Boat Parts: Names, Functions & Diagram
- Complete Guide on 13 Parts of Canoe: Names, Functions & Diagram
- Guide to Understanding 30 Parts of a Ship: name, functions & Diagram
- Guide to Unlock Parts of an Airplane: Names, Functions & Diagram
- Explore 50 Essential Parts of a Train: Names, Functions & Diagram
- Expert Guide to 32 Essential Car Parts: Names, Functions & Diagram
- Ultimate Guide-22 Car Engine Parts: Names, Functions & Diagram
- Ultimate Guide- 22 Car Interior Parts: Names, Functions & Diagram
- Discover 18 Key Parts of Car Wheel: Names, Functions & Diagram
- Ultimate Guide- 20 Key Car Body Parts: Names, Functions & Diagram
- Ultimate Guide- 13 Electric Car Parts: Names, Functions & Diagram
- Explore 8 Essential Parts of a Forklift: Names, Functions & Diagram
Leave a Reply Cancel reply
IMAGES
VIDEO
COMMENTS
Fold your paper in half lengthwise. Once you have creased it, unfold the paper and lay it flat. 5. Cut a little less than halfway down the crease that you folded down the length of your paper. This will create two flaps that will eventually become the wings of your helicopter.
Table 1: Paper helicopter template measurements. Hover over the cells to explore the various parts. Paper helicopter template assembly instructions. Put reinforcement tape, if needed. Cut along solid lines. Fold along dotted lines. Attach paper clip (s). Note that it's more convenient to attach the reinforcement tape before cutting as it ...
A simple paper helicopter can be made easily at home or school. Multipurpose U.S. letter-size printer paper (8.5 x 11 inches, 21.6 x 27.9 cm) works well for the model. The design is simple to make with only a few cuts and folds, and its parts can be easily adjusted to examine changes regarding flight behavior.
How to make a Paper Helicopter - Simple and EasyI use to make these helicopters as a child and had a bunch of fun. They are easy to make and easy to fly. I h...
One paper clip A ruler Instructions: 1. To make the helicopter, use a ruler to draw the dashed lines and solid lines onto your piece of paper as shown in the pattern. The dashed lines are fold lines, and the solid lines are cutting lines. 2. First, cut along the solid lines on your piece of paper. Then, complete the following folding steps. 3.
7. Fold panel C along the dotted line downward. 8. Push the paper clip onto panel C and push it all the way in. 9. Fold the two rotor panels (D and E) along the dotted line so that one bends forward and the other backward. These are the blades of the helicopter. 10. Turn the helicopter so that the blades are on top.
Origami Helicopter - How to make a Paper Helicopter (Origami Hubschrauber)Check this tutorial on how to make a paper helicopterSubscribe to channel: http://b...
Instructions: Cut around the outside of the helicopter. Cut along the solid lines. Fold the side pieces in to form the body of the helicopter. Fold one wing toward you and one wing away from you to form the rotor. Fold the helicopter body up about 1 cm from the end. Use the paper clip to hold this fold. Drop the helicopter from a high place and ...
Start by obtaining a strip of paper measuring approximately 20 cm in length and 4 cm in width. Cut the paper along the dotted lines to create a specific shape for your paper helicopter. Fold the longer length of the paper strip and secure it in place using glue. This will form the main body of your helicopter. Congratulations!
INSTRUCTIONS: STEP 1: Print the paper helicopter template and cut out the cardstock. STEP 2: Fold it into a pinwheel shape. STEP 3: Use the push pin to secure the pinwheel and attach to the wine cork. This will provide weight to your design. STEP 4: Take your paper helicopter outside and toss into the air!
A: When you make a paper helicopter, you're making a propeller. Tilting the blades will enable the propeller to produce lift by creating faster moving air on the top, which has less pressure than on the bottom. If spun right, the paper helicopter will fly into the air! If dropped from a high point, it will circle gently to the ground.
Origami Helicopter - How to make a Paper HelicopterIn this video, we make an A4 paper helicopter.Friends! Thank you for your likes and comments! I am very pl...
Step 1: Start by taking a piece of paper and folding it in half lengthwise. Make sure that the edges are aligned correctly, and the crease is sharp. Step 2: Next, unfold the paper and fold each corner towards the center crease. This will create two diagonal folds that meet in the middle.
Here's how to make the paper helicopters. Step 1: Cut the paper to a width of 5cm. Step 2: Cut the paper the length of paper rotor length plus leg length, and add 2 cm for the body. Step 3: Cut dotted lines at Leg A and Leg C. The length of each cut is 5 cm minus leg width divided by 2. Step 4: Fold leg A onto leg B.
1. Cut out the helicopter. Cut along the dashed lines of the template. If you're using plain paper, make a sketch of the helicopter solid and dashed lines as a guide. + Expand image. 2. Fold along the solid lines. The propeller blades, A and B, should be folded in opposite directions along the solid lines.
The paper helicopter that has shorter blades should fall faster because the shorter blades do not generate as much lift. ... They build, test, and maintain parts for air and spacecraft, and assemble, test, and maintain the vehicles as well. They are key members of a flight readiness team, preparing space vehicles for launch in clean rooms, and ...
The paper helicopter is made of a square sheet of paper 21x21 cmS... Origami Helicopter - How to make a Paper HelicopterIn this video, do an origami helicopter.
This paper helicopter template will help children understand some basic principles of physics in an engaging, practical, and interactive way. It's a fun innovative development on the basic paper plane and the resource is also a great introduction to the main elements of any successful science experiment. Simply print and distribute, the easy-to-follow instructions will allow students to ...
Play and Learn. By building and test flying two different paper helicopters, you will learn how the size of the Mars helicopter, Ingenuity's, rotor blades are important for it to be able to fly in the thin atmosphere of Mars. Out for a Spin. Build and test different paper helicopters.
This helicopter has to be lightweight and have large blades to fly on Mars. These large blades rotate so quickly that they generate enough lift to overcome the gravity of the Red Planet and lift off the ground. In this project, students will build a paper helicopter. Then, just as NASA engineers had to try out different versions of the Mars ...
Introduction. 28 Parts of Helicopter and Their Functions [Complete Guide]: - Helicopters can be utilized for many things. They can be utilized as flying ambulances to convey patients. They can be loaded or stacked with water to fight large fires. Helicopters are utilized to get supplies to ships.
Crafting a flying paper helicopter is an engaging adventure. Follow our guide to master folds and design a functional paper copter. Elevate your paper crafti...
A helicopter is a remarkable aircraft that utilizes horizontally spinning rotors to generate lift and thrust. The unique design of a helicopter enables it to perform impressive feats such as vertical takeoffs and landings, hovering in mid-air, and flying in any direction - forwards, backward, and laterally. It is a remarkable engineering ...